

Now, if you've been following the series and working along, you should already have a working Next.js app running on an EC2 instance. If not, then head over to the previous article where we go through all the steps and all the pre-requisites for hooking up your own custom domain.
DNS configuration
In order to redirect our app to a particular domain we need to make some changes in our DNS provider. The UI for this step will vary depending on the DNS provider, but essentially the steps are the same, which should be available in all the providers.
So, head over to your EC2 instance and copy the public IP.
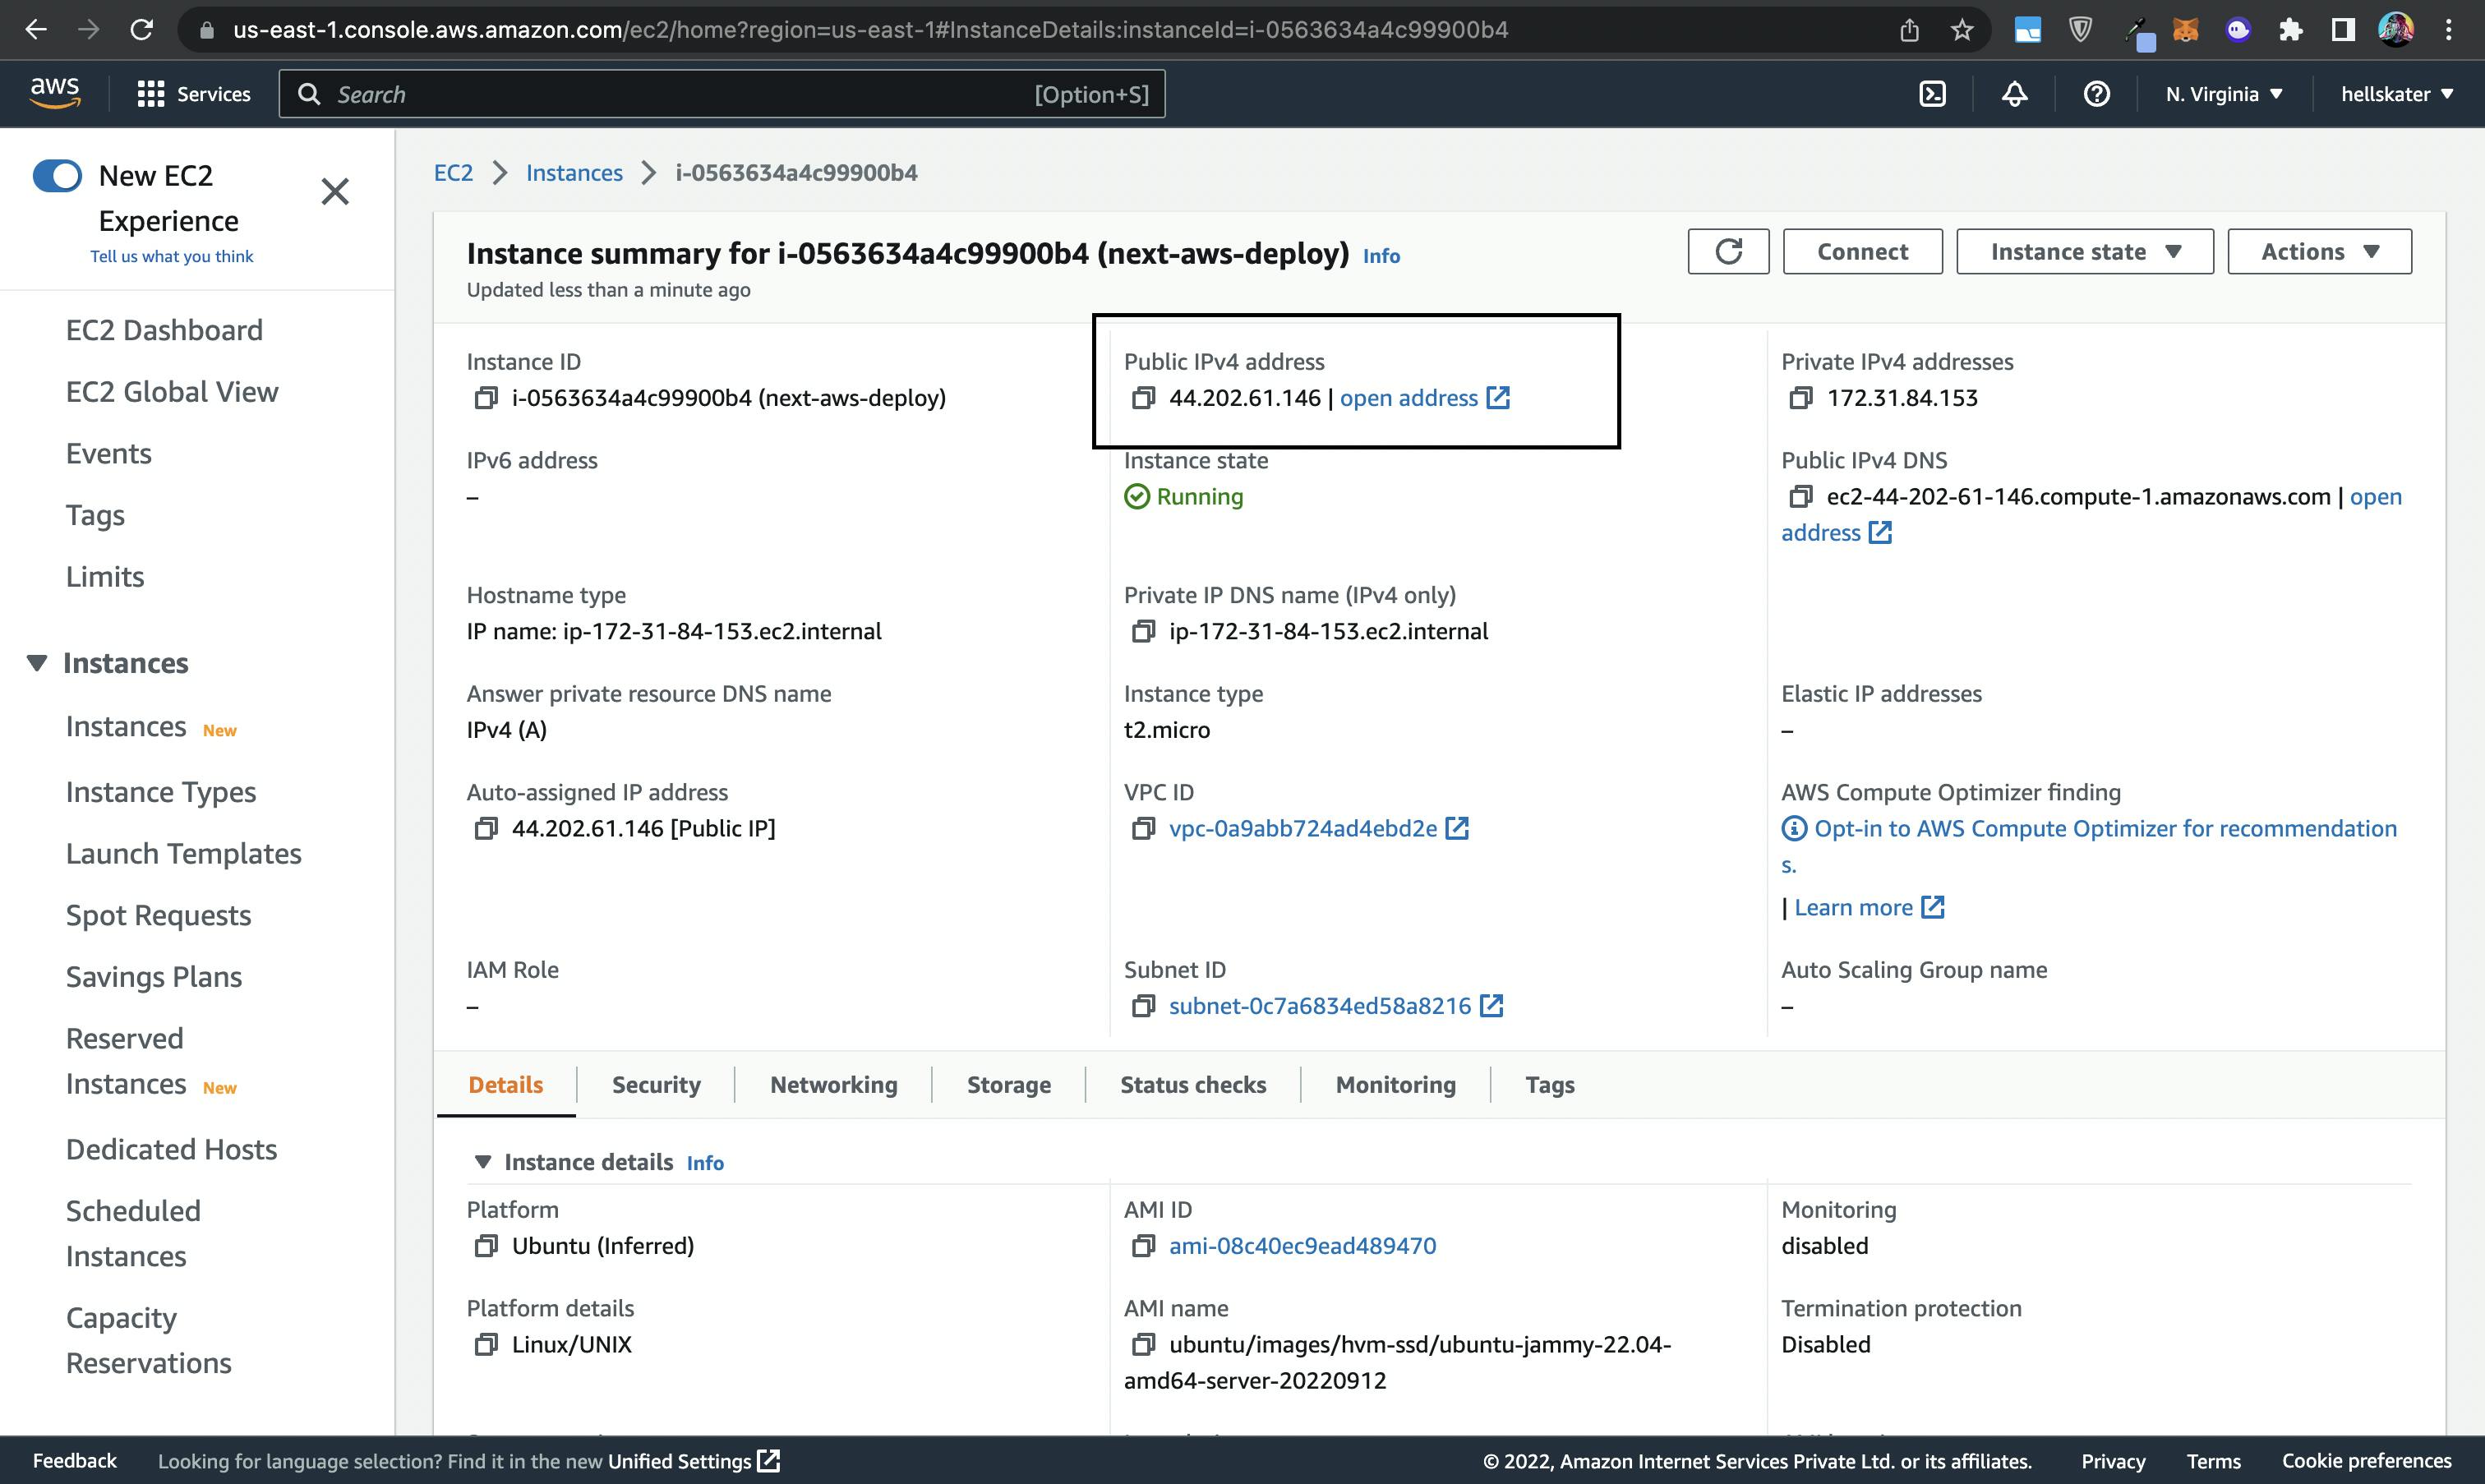
Now open your DNS provider settings, if you want to redirect the app to your root domain, which should be something like example.com, then add an A record with Name as @ and value as your EC2 public IP, e.g. 44.202.61.146.

But, if you want to redirect the app to a sub-domain, which we'll be doing in this article, then add an A record with Name as your sub-domain name, like <YOUR-DESIRED-SUB-DOMAIN>, which in our case will be example and value as your EC2 public IP, e.g. 44.202.61.146.

That's it from the DNS side. Since my domain is srini-dev.tech, this will create a sub-domain example.srini-dev.tech, which points to our EC2 instance.
Nginx configuration
In previous article, our Nginx configuration file example.conf looked something like
server {
    listen 80;
    listen [::]:80;

location / {
        proxy_pass http://127.0.0.1:3000;
        proxy_set_header Host $host;
        proxy_set_header X-Real-IP $remote_addr;
        proxy_set_header X-Forwarded-For $proxy_add_x_forwarded_for;
        proxy_set_header X-Forwarded-Proto $scheme;
    }
}
Now we just need to add one more field called server_name in the config file to redirect our app to our domain example.srini-dev.tech
server {
    listen 80;
    listen [::]:80;
    server_name example.srini-dev.tech;

location / {
        proxy_pass http://127.0.0.1:3000;
        proxy_set_header Host $host;
        proxy_set_header X-Real-IP $remote_addr;
        proxy_set_header X-Forwarded-For $proxy_add_x_forwarded_for;
        proxy_set_header X-Forwarded-Proto $scheme;
    }
}
Great! Now if you open your domain, which should look something like http://<YOUR-DOMAIN>, which in my case is http://example.srini-dev.tech, in the browser, you should see your app.
SSL/TLS HTTPS configuration
As a next step, we will enable HTTPS for our domain, luckily we can do it for free using certbot. Follow the docs for the latest installation steps. Now, open your terminal and type the following commands
sudo snap install core; sudo snap refresh core
sudo snap install --classic certbot
sudo ln -s /snap/bin/certbot /usr/bin/certbot
sudo certbot --nginx
This should open a prompt where it will ask your email address for the SSL certificate and a few yes/no questions, you can go with yes for all of them. After that it will ask you to choose the particular domain you want an SSL certificate for, it will take the domain name from your example.conf file, select the domain using the respective number.
Congratulations!! if you head over to your domain now, you should see https
