

First of all, there are plenty of other easy and faster ways to deploy your next app, like Vercel and Netlify, where you can get it up and running in a matter of seconds. So if it's a personal project or a small one, feel free to try those out.
If you're still here and you want to deploy your own app end to end yourself, in your own managed server in AWS, then let's jump right into the code 🚀. We'll go through every single step until our app is online.
Note: I will be using a Mac machine for this tutorial, there won't be much difference if you are on Windows, I'll mention some links to other articles if some of the steps are different.
Creating the Next project
If you are here for the deployment then most likely you already have a Next app ready, if not, then I guess you might wanna do that 1st?
Head over here and set up your first Next project.
Pushing the project to GitHub
Head over to GitHub, sign up/log in and create a new repository and copy the https link.
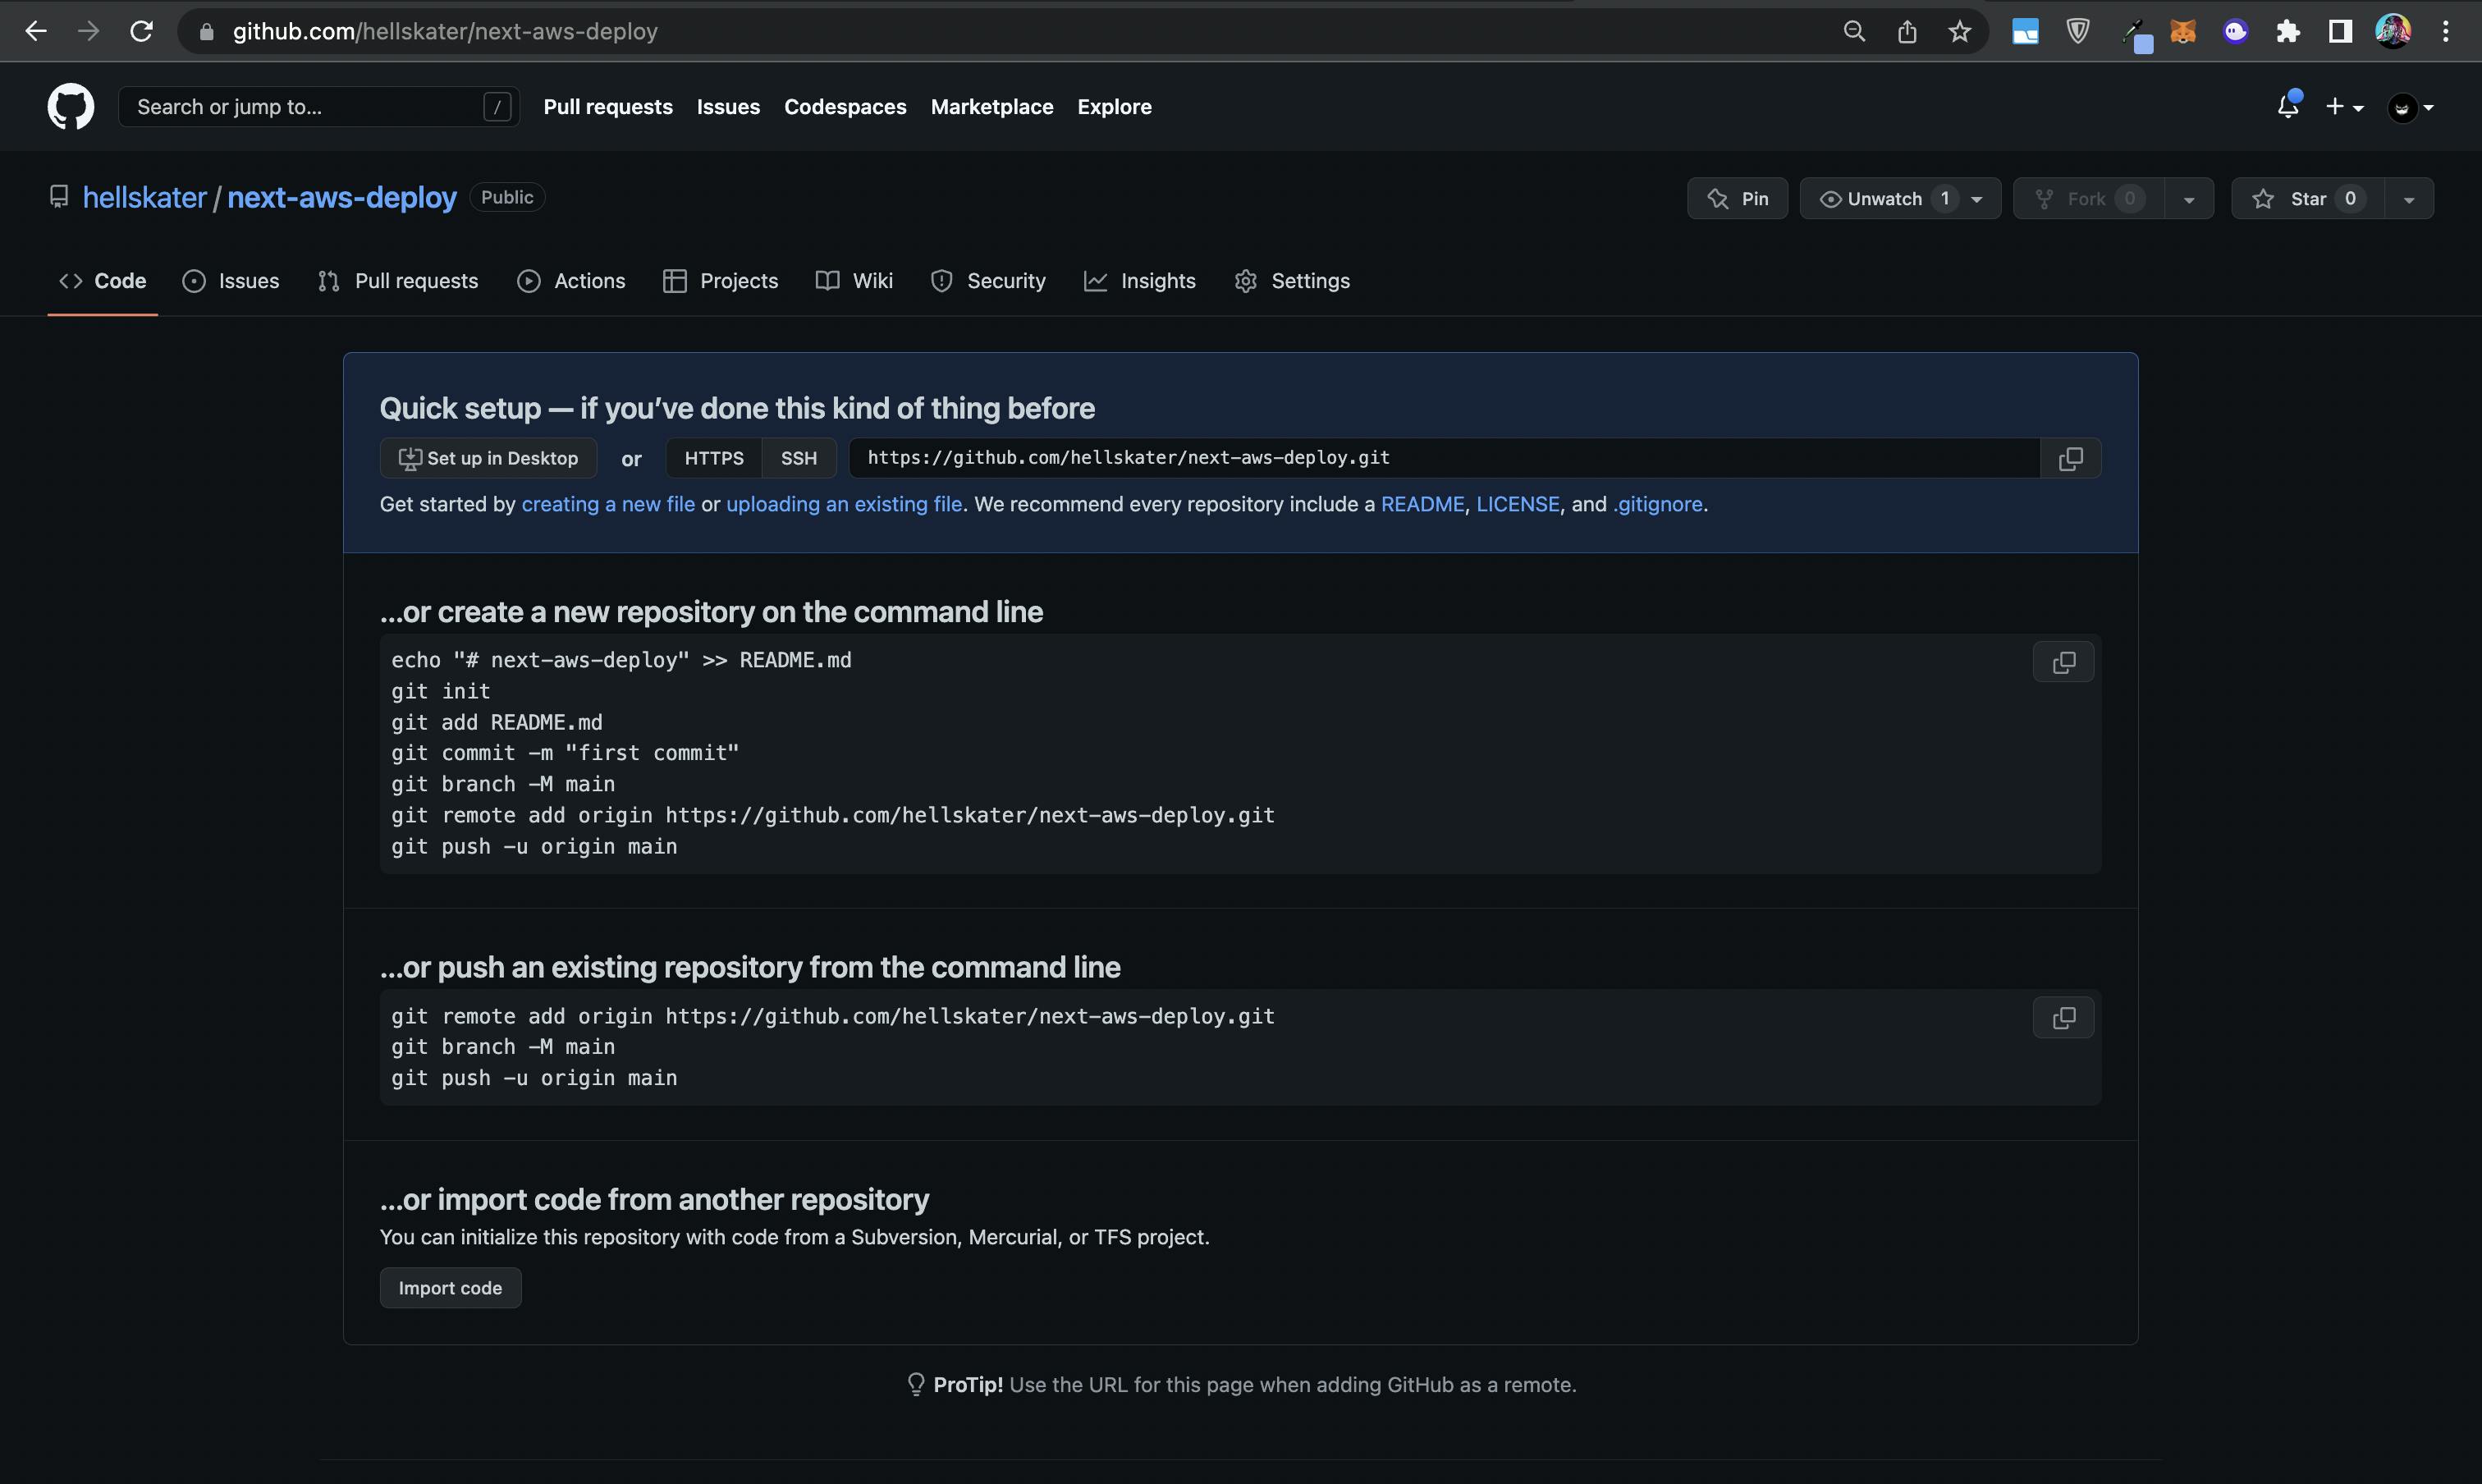

Move inside your project folder and run these commands
git init
If you used create-next-app to initialise your project then you must already have a .git folder, in that case you don't need to run the above command. Start from the following.
git add .
git commit -m "initial project"
git remote add origin <YOUR COPIED HTTPS URL>
git push origin main
Head over to your repository in GitHub and you can see your project files there ✨.
Launching an EC2 instance
Now we're not gonna go through how to create a new account in AWS, you can check the official docs of AWS, they have a detailed step by step guide.
Now assuming that you've set up your account and logged in. Go to Services -> EC2 -> Launch Instance
Only change the fields that we discuss here, leave everything as it is by default
- Type a name for your instance and select
Ubuntuin AMI.
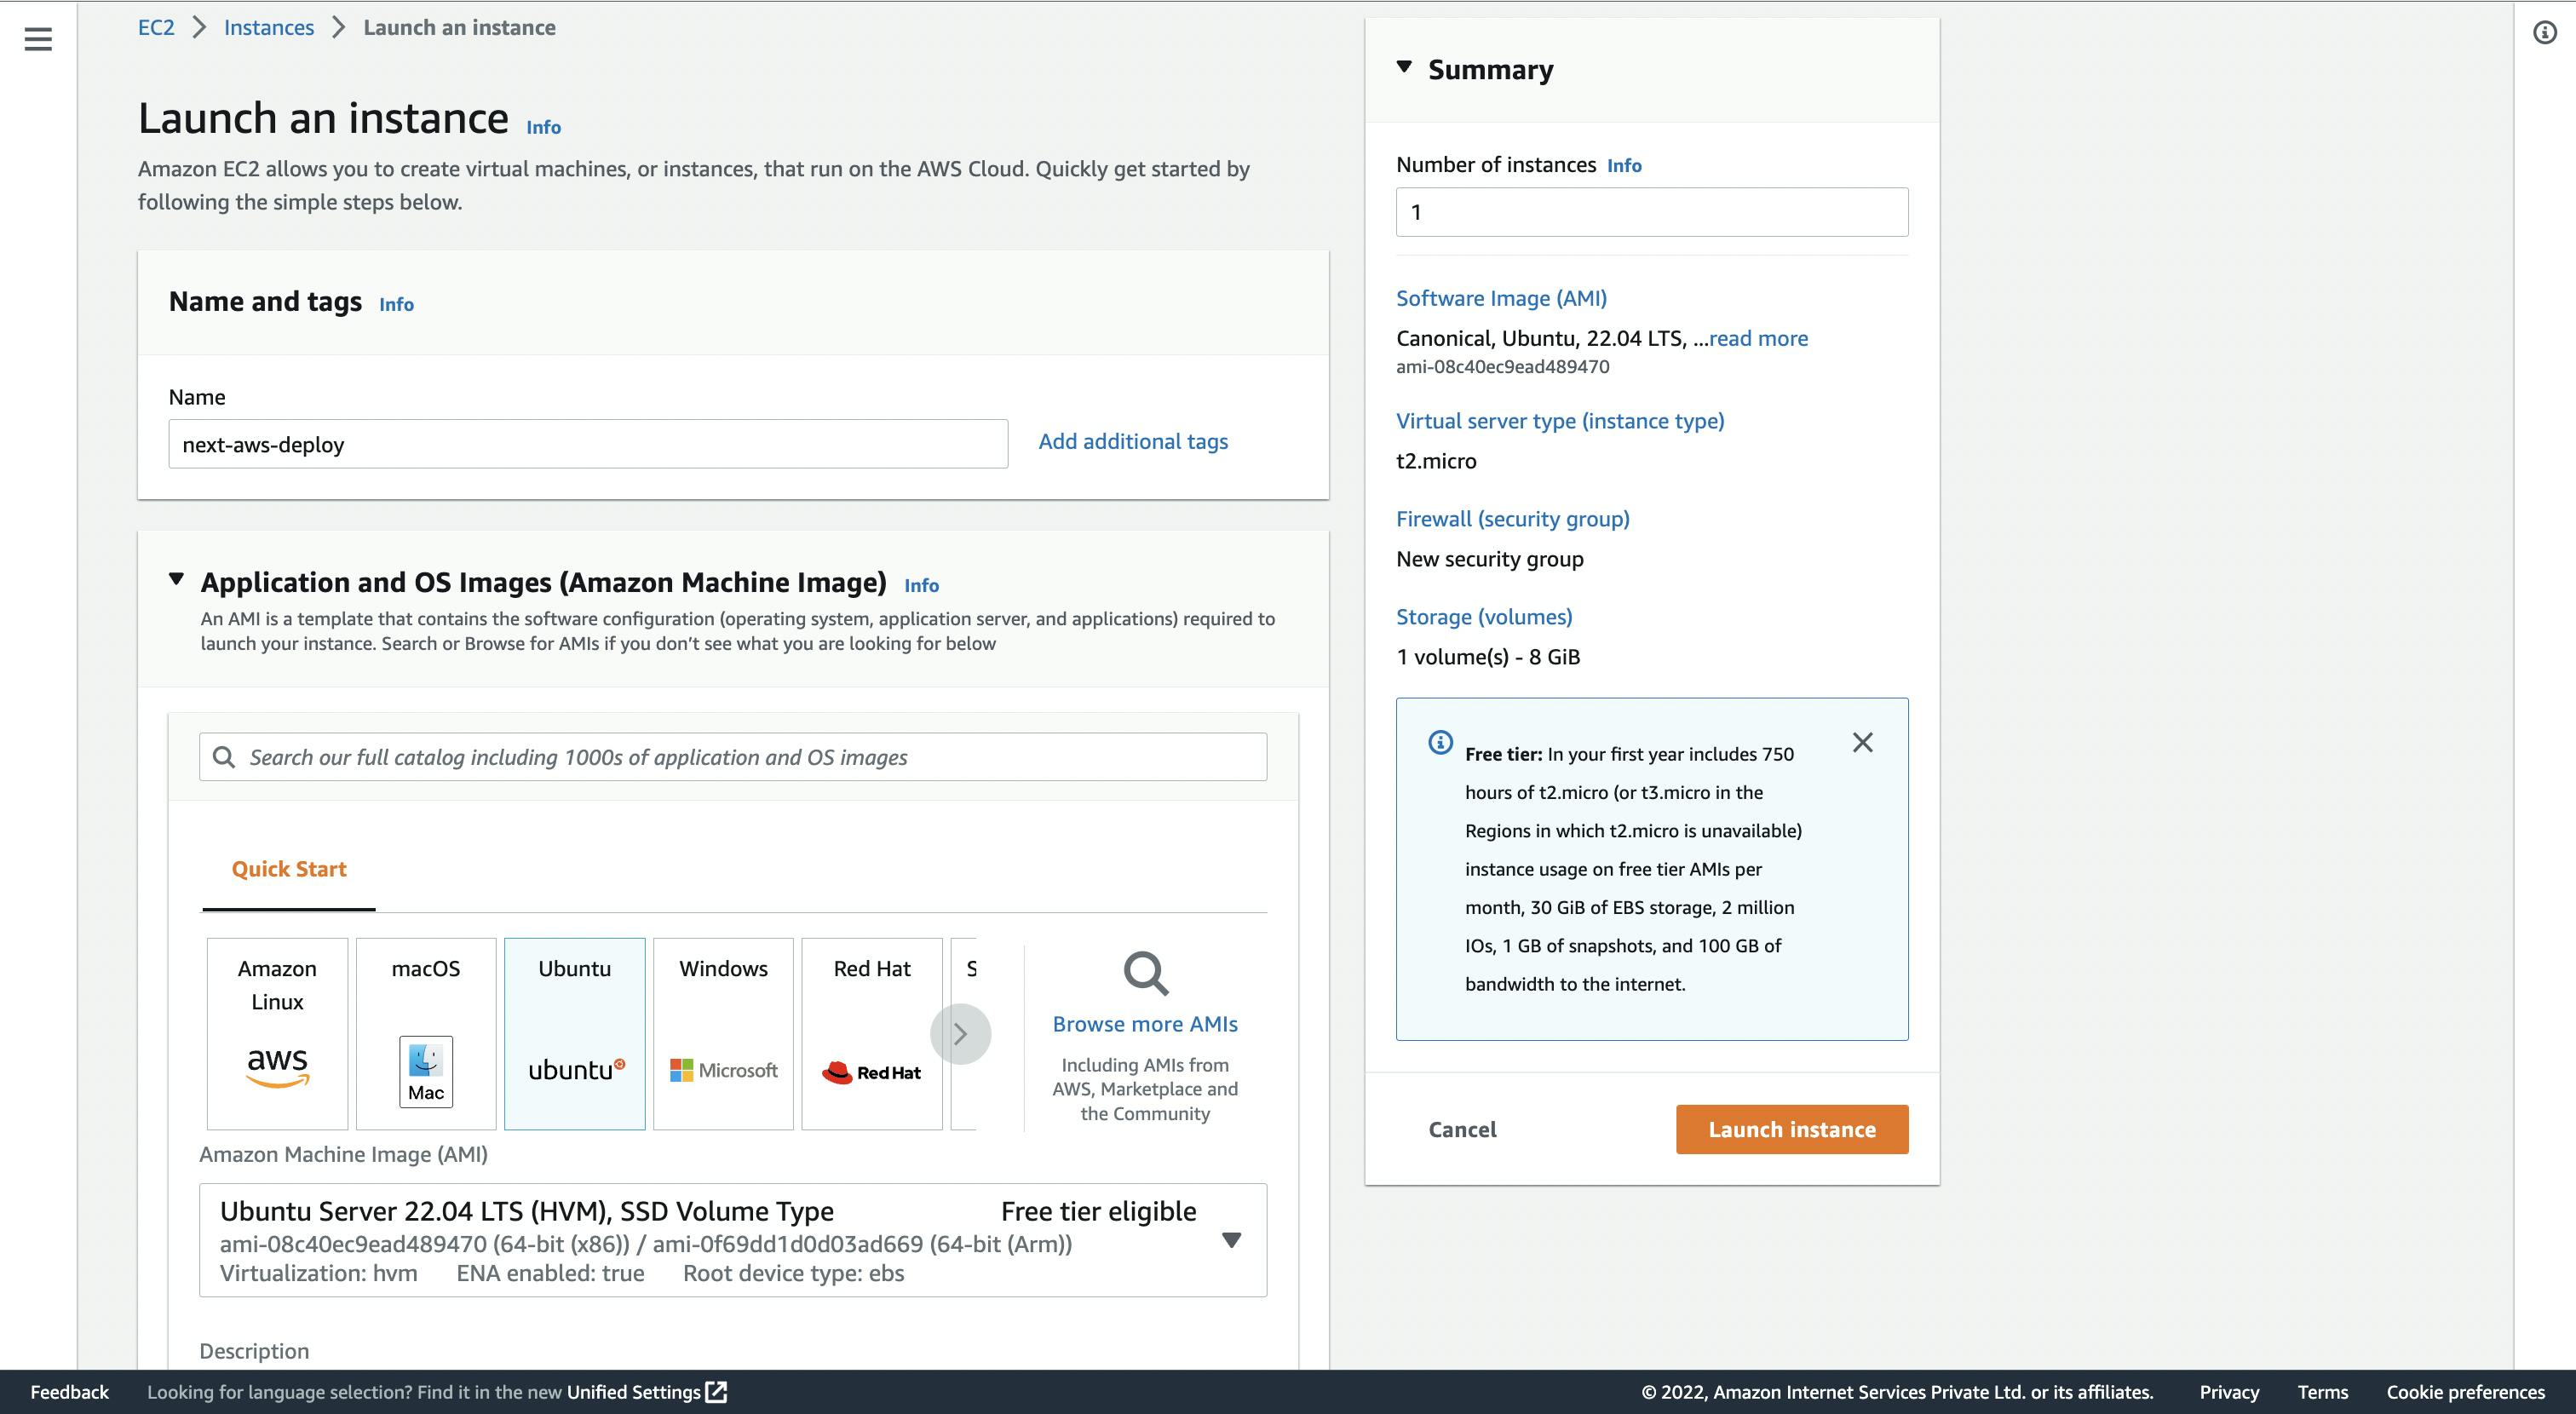
- Click on
create a new key pair, type a name for your key pair and click onCreate key pair.

Please don't lose your key pair file, or you won't able to access your instance
- In
Network Settings, click onCreate security groupand checkAllow SSHfromAnywhere,Allow HTTPSandAllow HTTP.
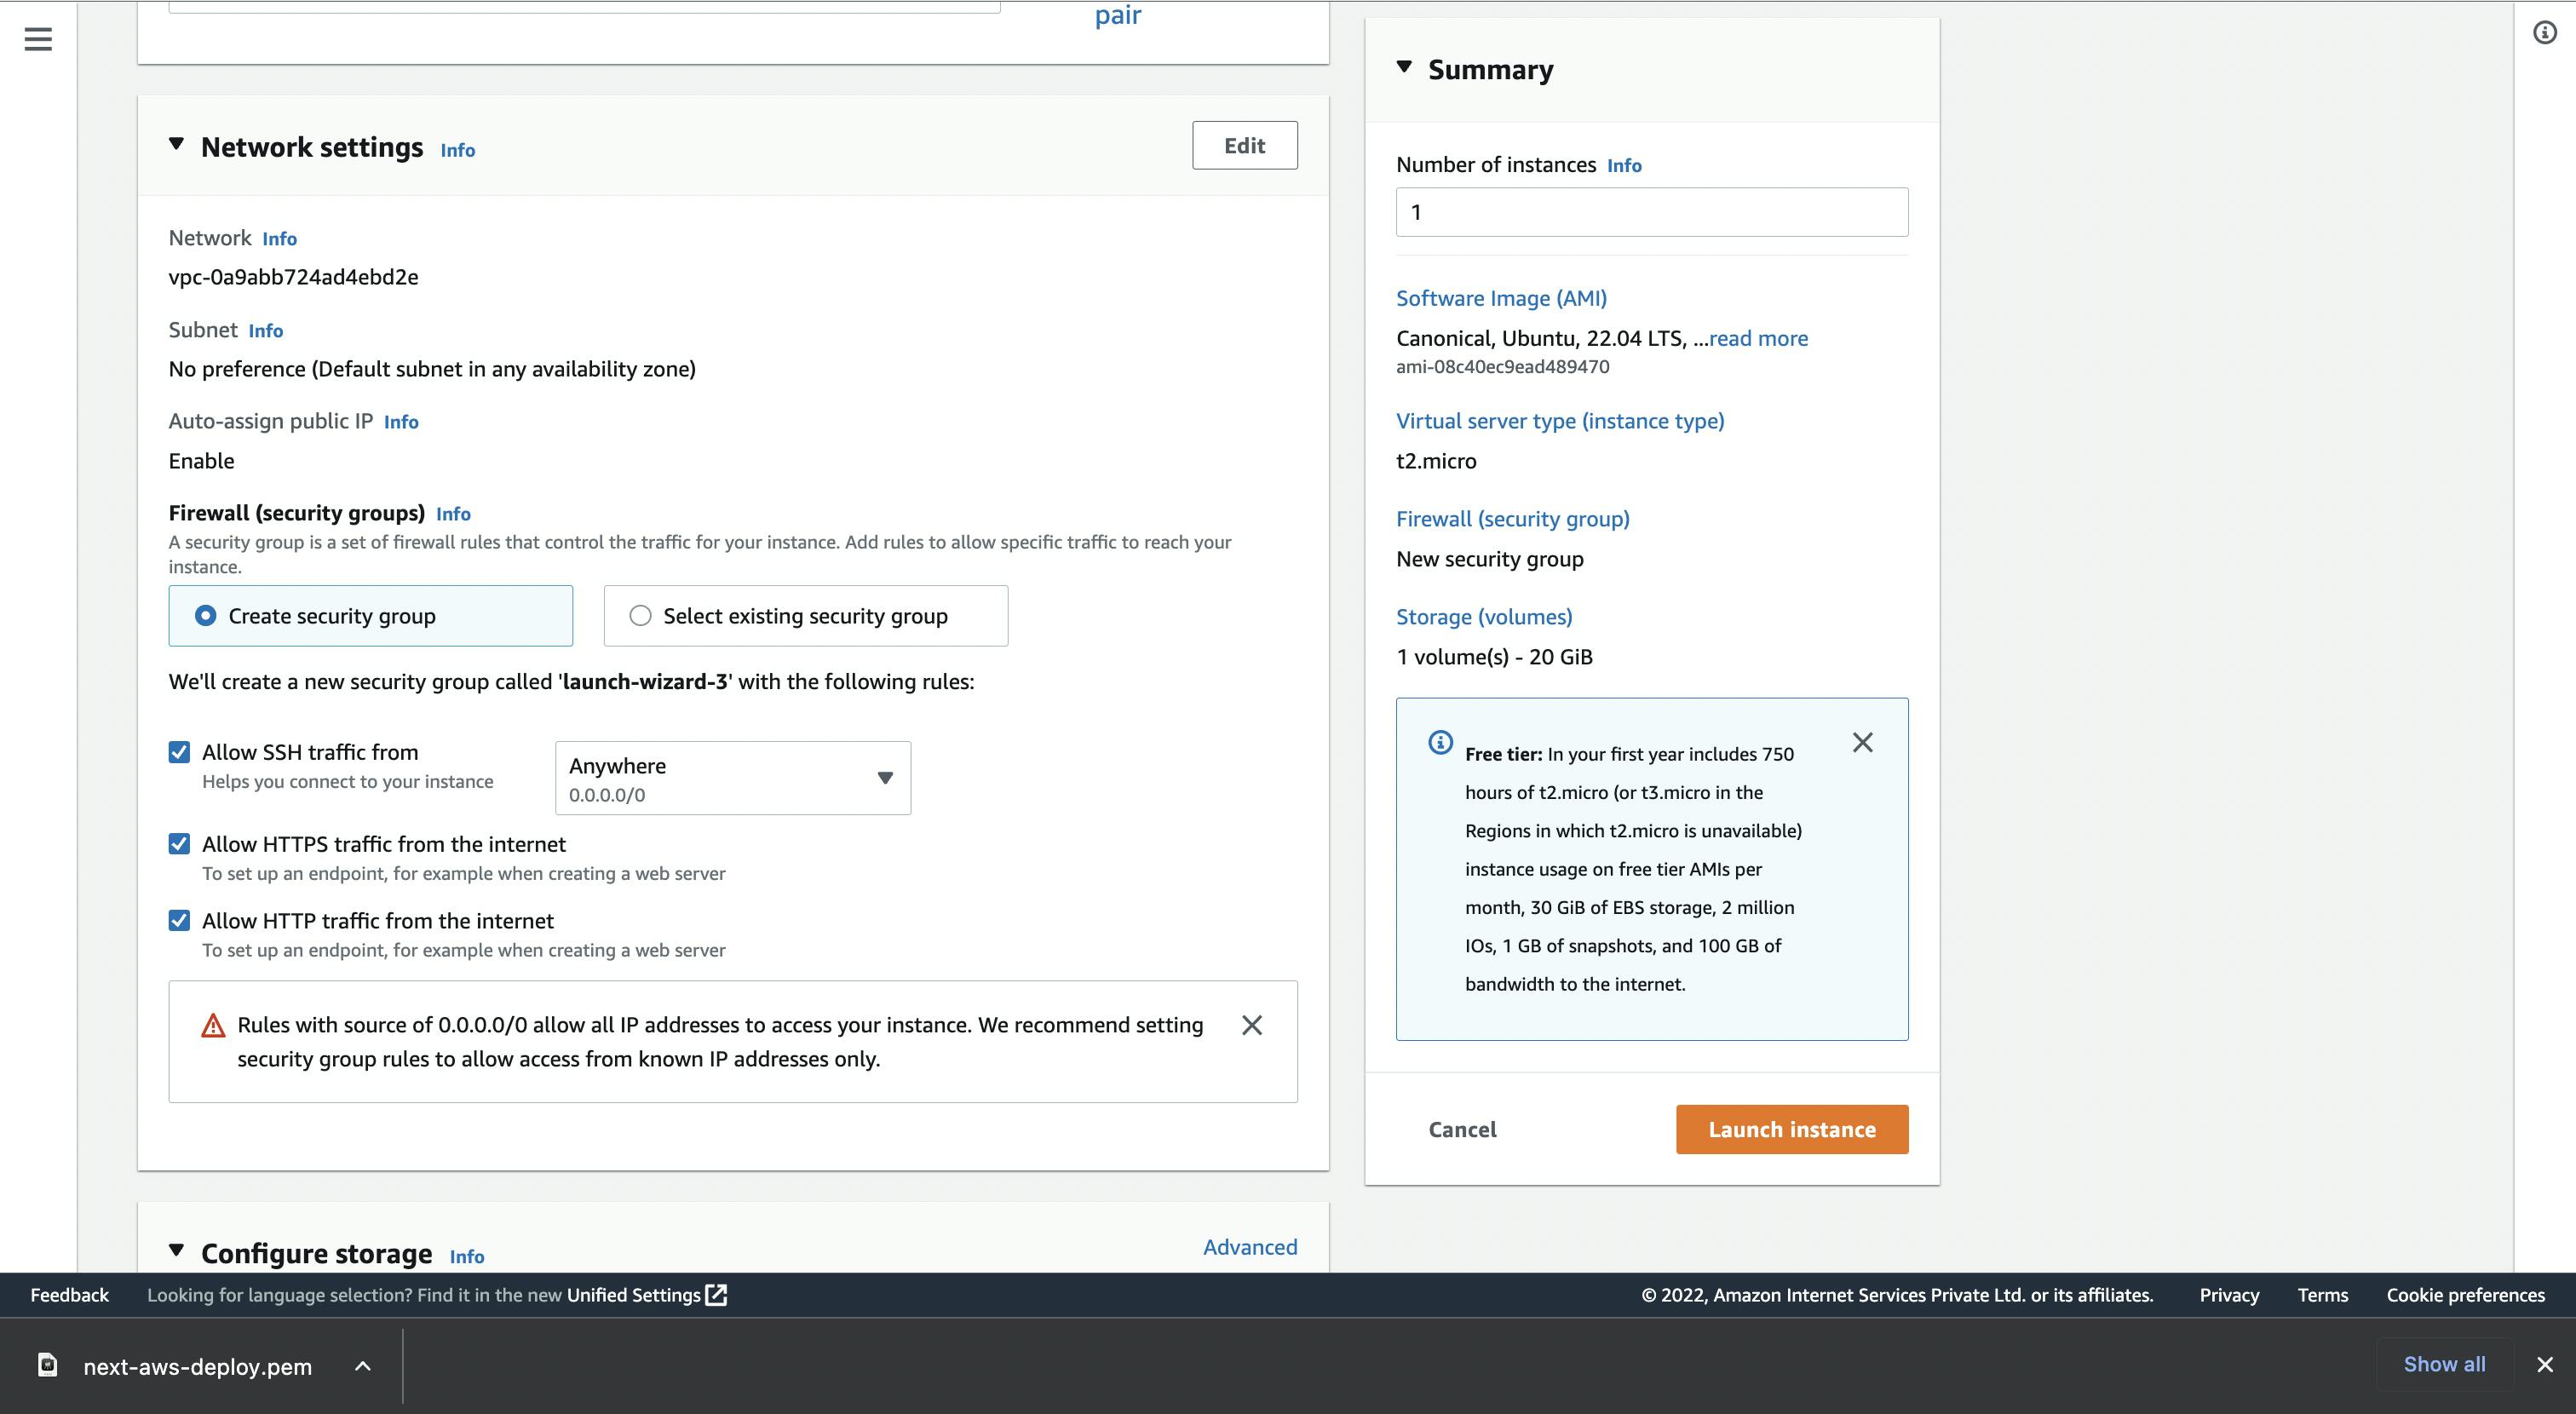
- In
Network Settings, click onEdit

Scroll to the bottom of Network Settings and click on Add security group role
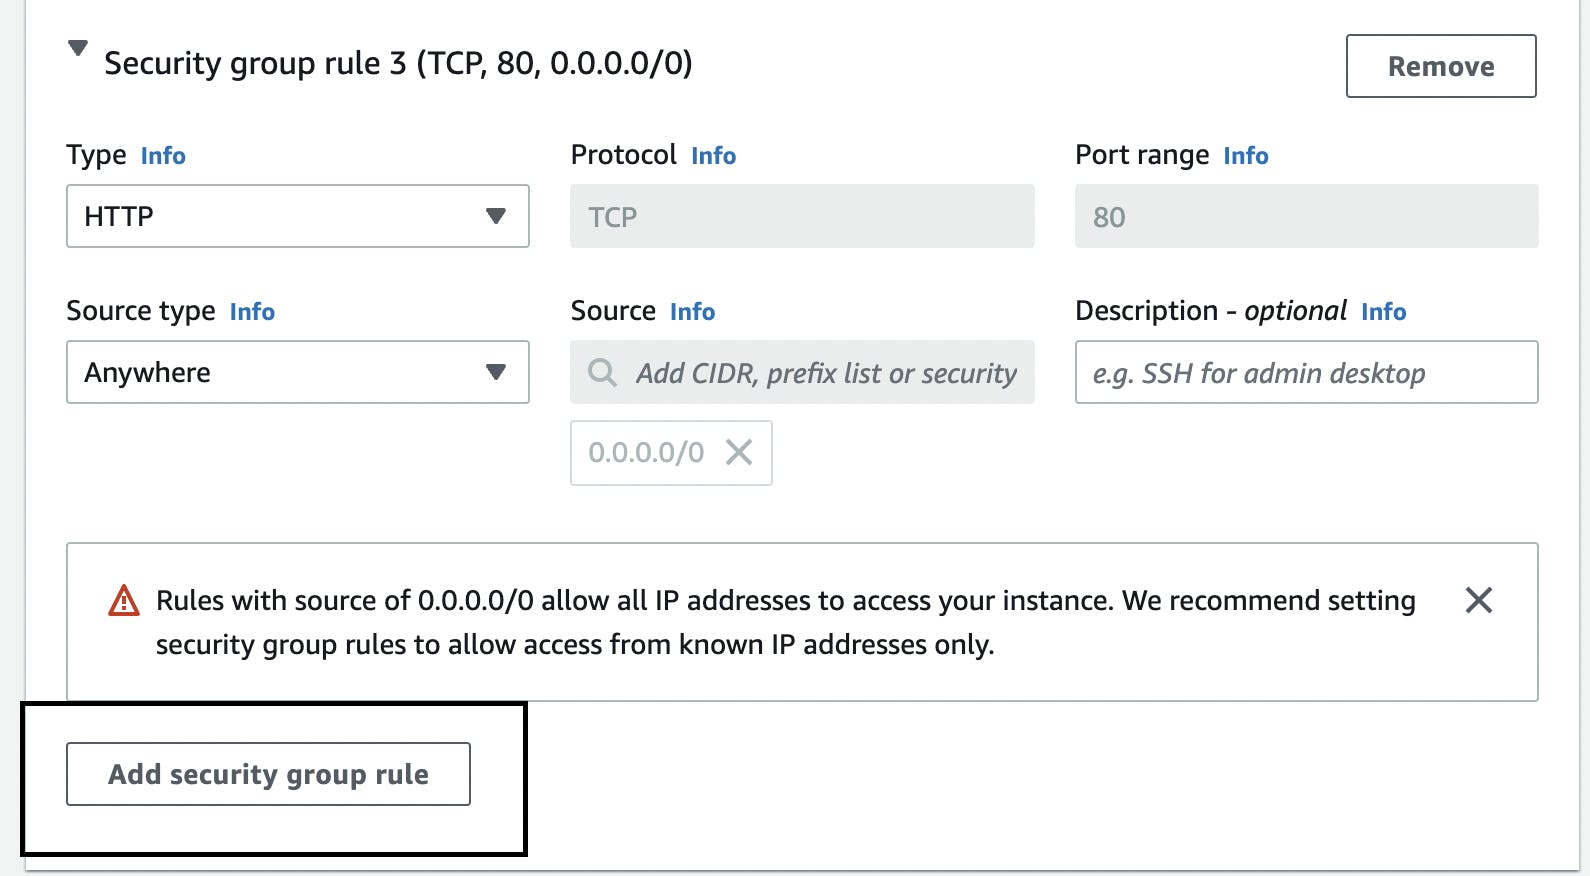
In the new security group rule, in Port range type 3000, in Source select 0.0.0.0/0
- In
Configure storage, create20 GiBof volume.
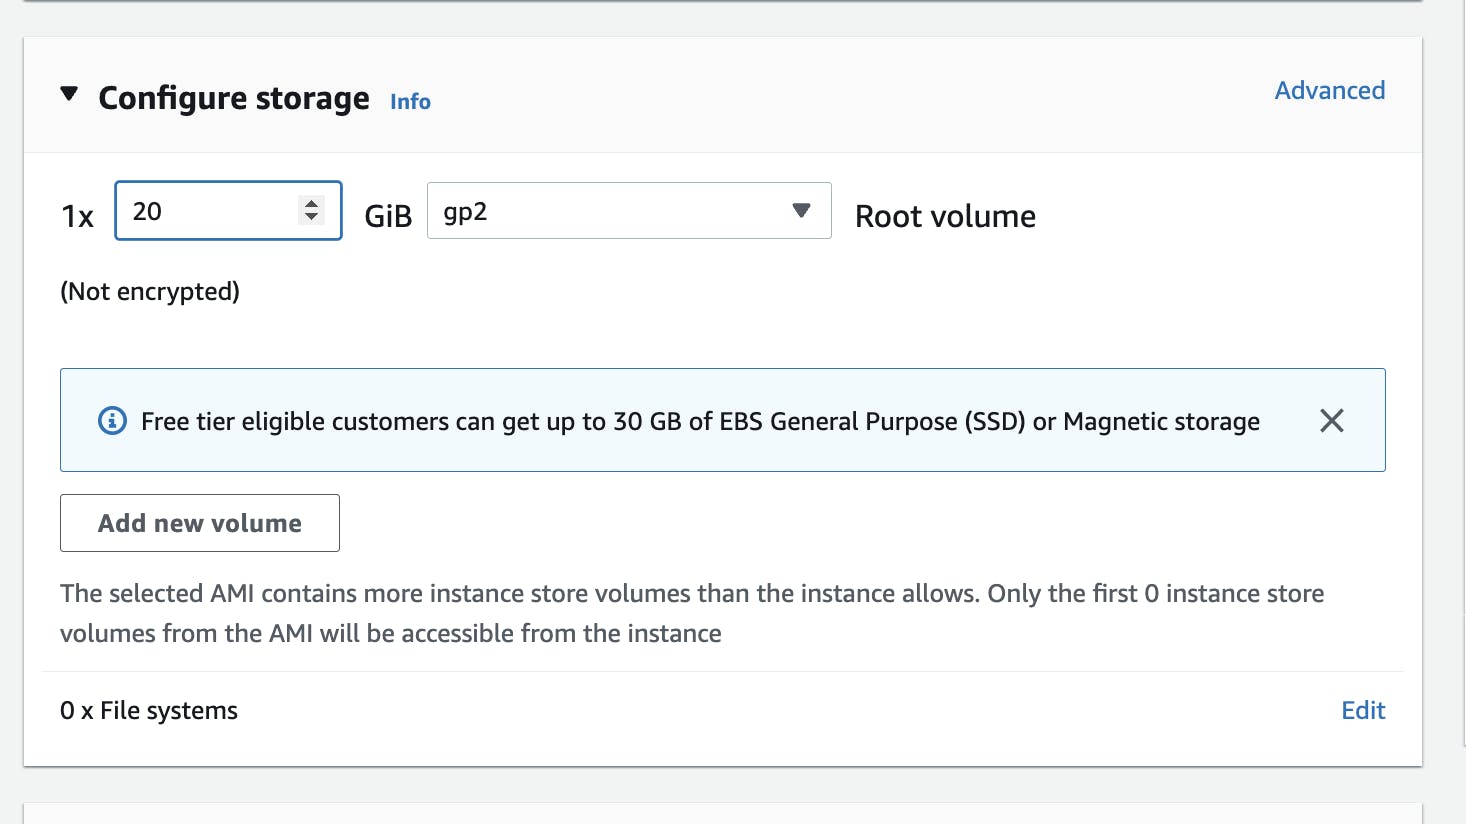
That's it. Now click on Launch instance. And you have an instance running. 🚀
Logging into our EC2 instance
Now that we have our instance up and running, we need to get inside it to set up our server, which we are gonna do using SSH.
Go to Services -> EC2 -> Instances and click on your newly created instance.
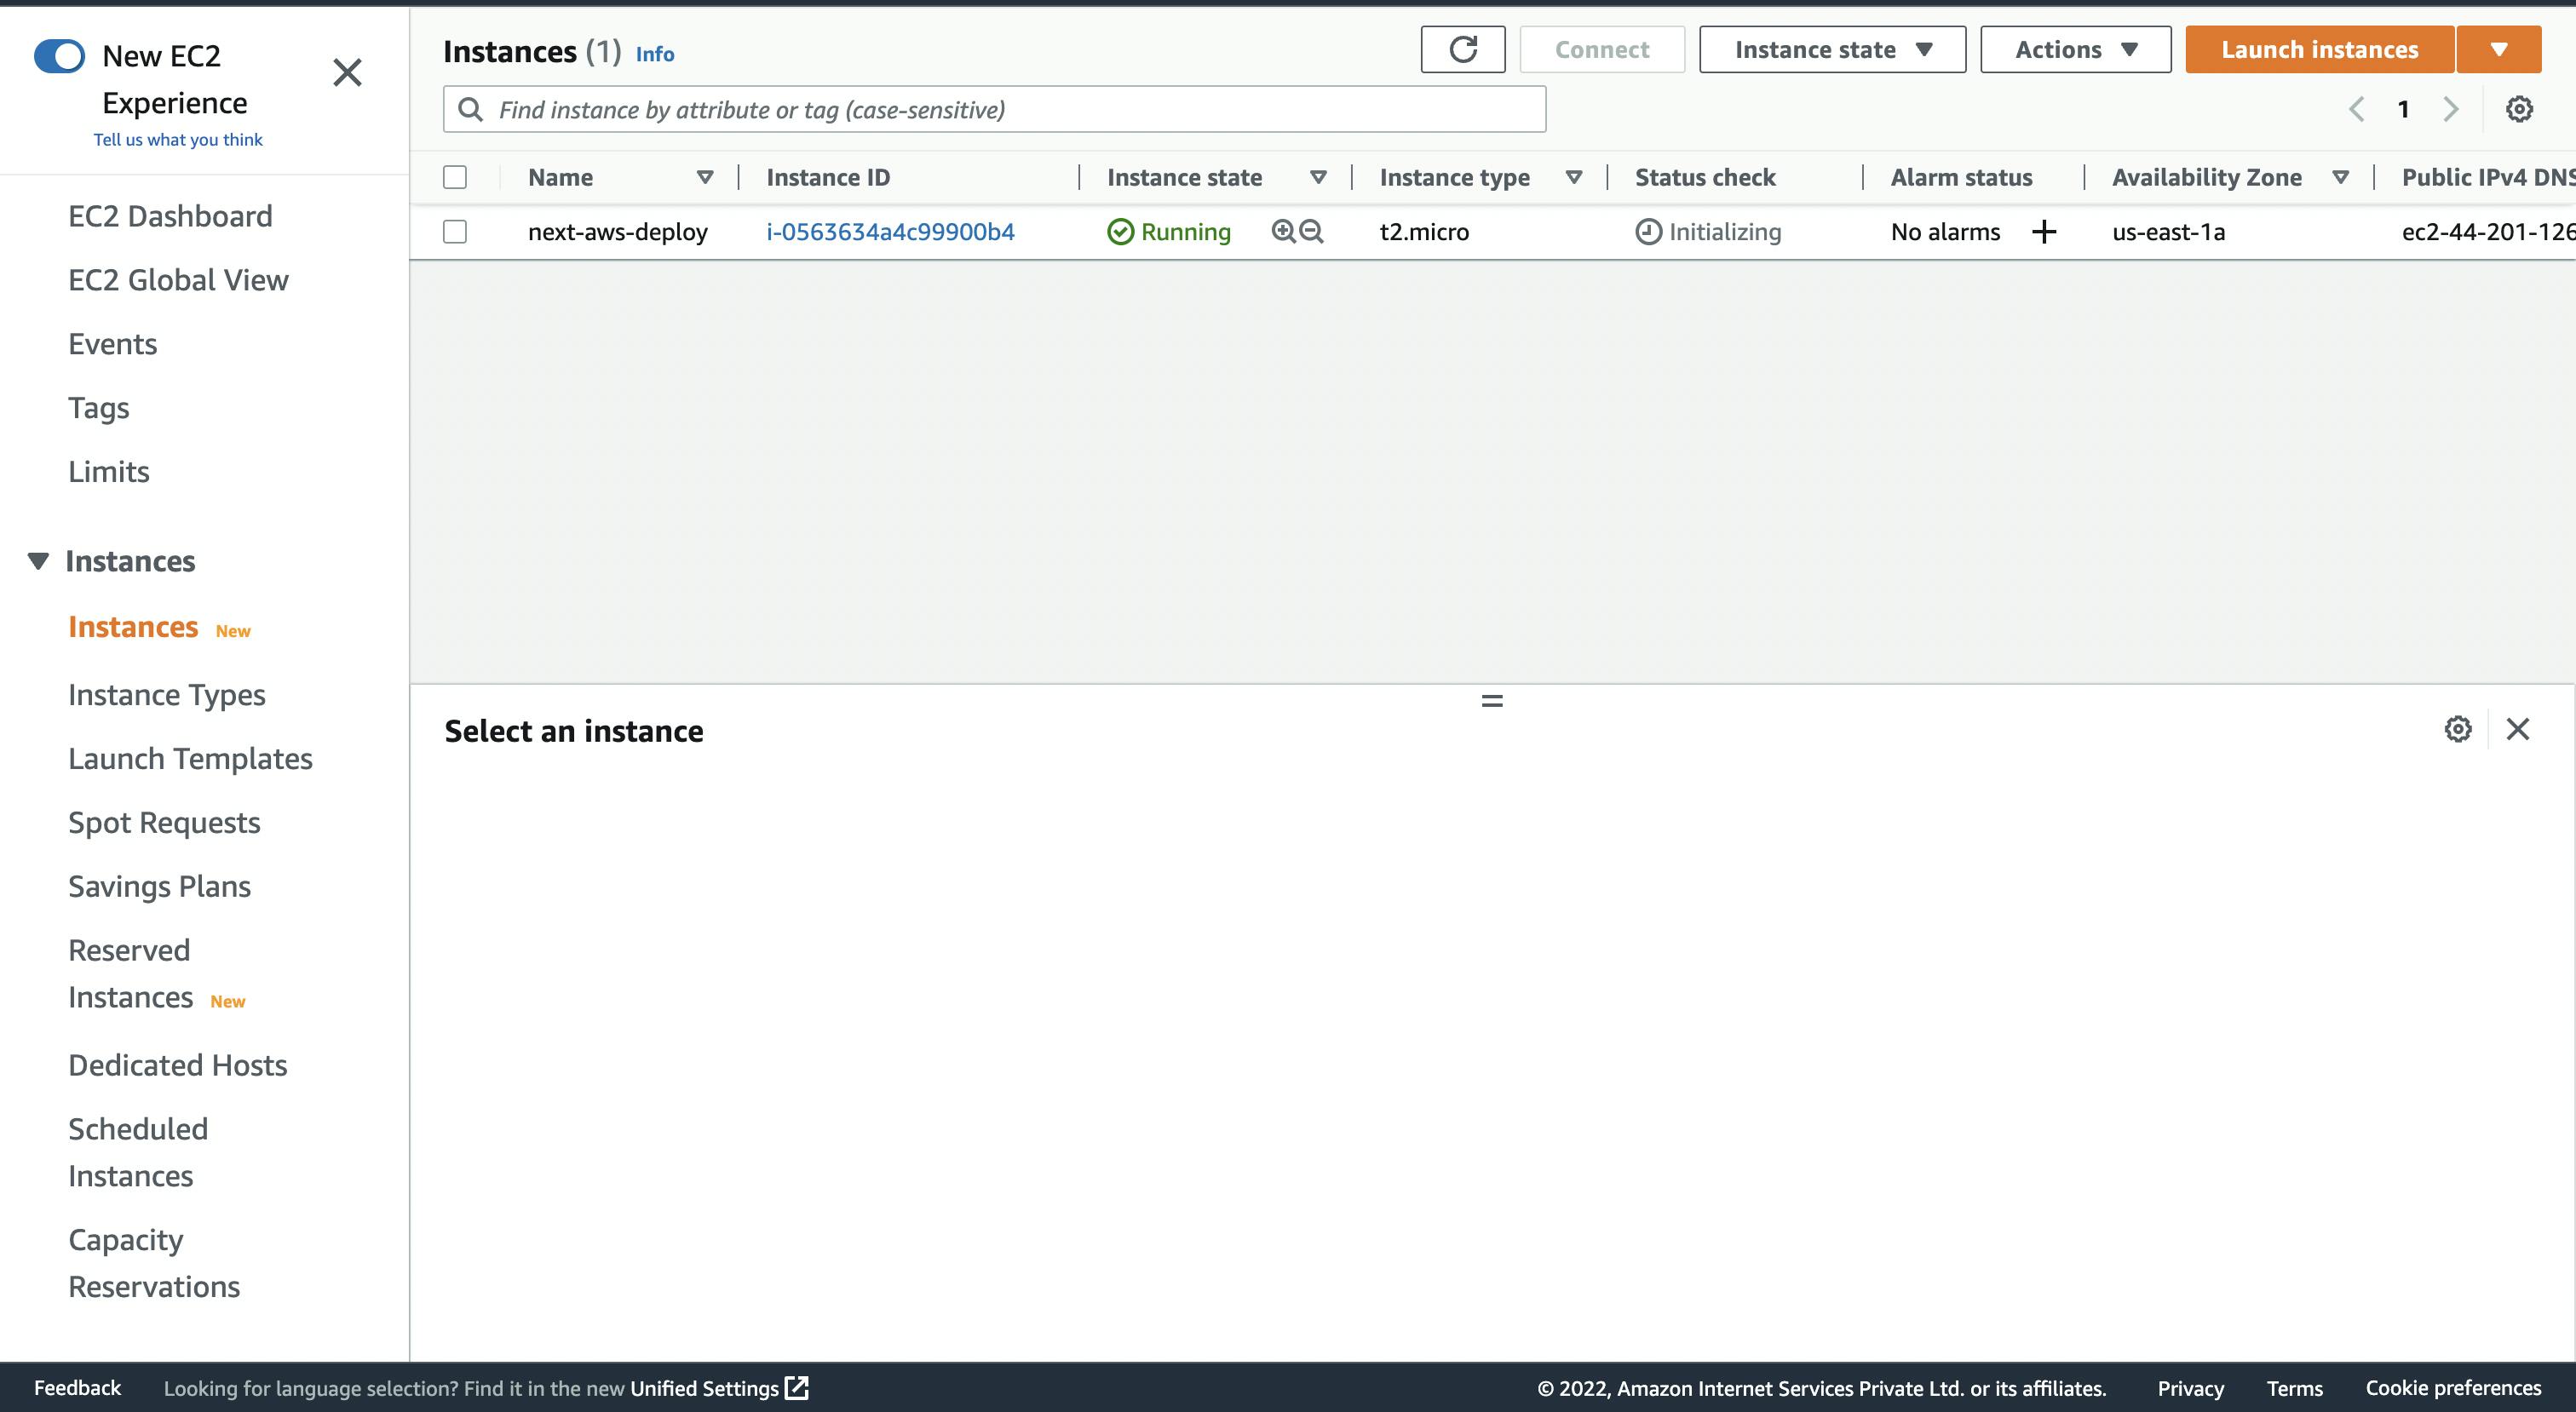
Now copy your Public IPv4 DNS address, which we will use to log into our instance
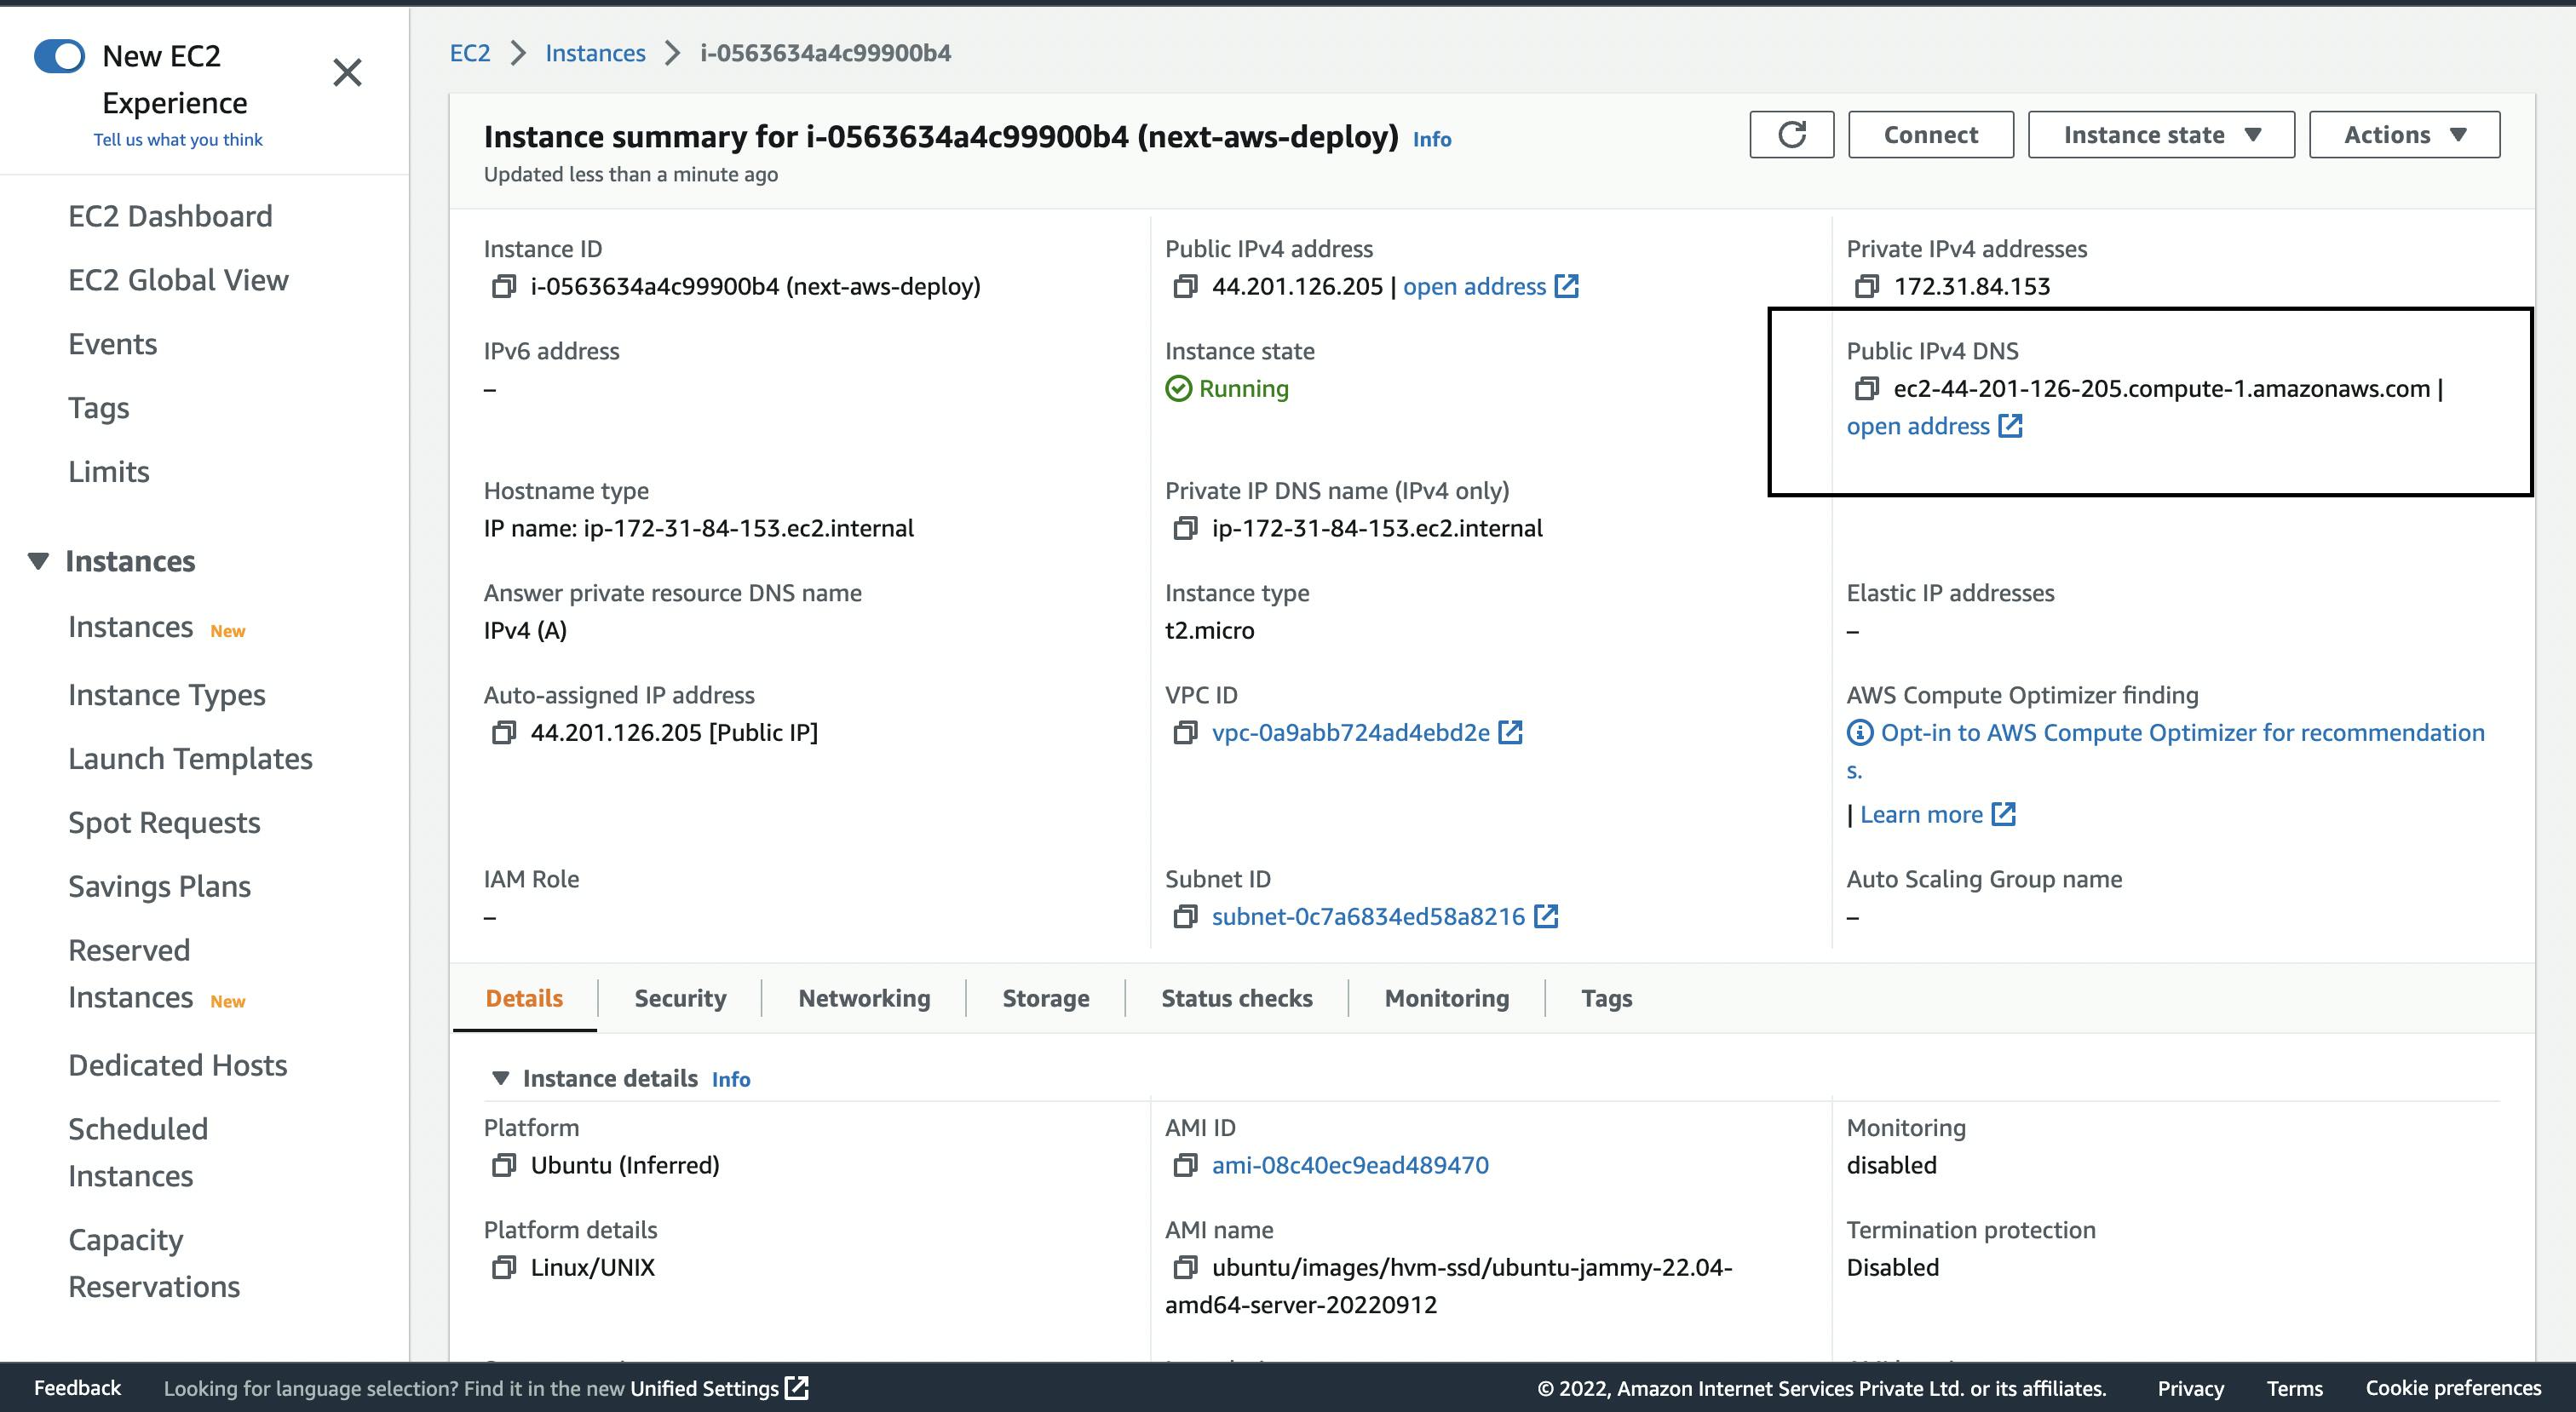
Note: If you are on a windows PC then skip the next few steps to log into the instance and checkout docs.
Now, for Mac users, open your terminal and cd into the directory where you have downloaded your .pem, and type the following commands
chmod 400 <YOUR-KEY-NAME>.pem
ssh -i "<YOUR-KEY-NAME>.pem" ubuntu@<YOUR-COPIED-PUBLIC-IPv4-ADDRESS>
Fill the fields as per your own details, for example in my case the commands would look like
chmod 400 next-aws-deploy.pem
ssh -i "next-aws-deploy.pem" ubuntu@ec2-44-201-126-205.compute-1.amazonaws.com
Click on yes and if everything goes right then you should see a similar shell like this on your terminal
ubuntu@ip-172-31-84-153:~$
Congrats!! You have successfully logged into your EC2 instance ⚡️.
Setting up server on EC2 instance
Now that your have your SSH shell open, run the following command
sudo apt update
We need to install Nginx to server our app, you can read more about it here. To intall Nginx run
sudo apt install nginx
Next we'll need Node.js in our Ubuntu machine to run the Next app. We will install Node using NVM, which is a version manager for Node. Please follow the official docs to install NVM and Node or follow the following commands
wget -qO- https://raw.githubusercontent.com/nvm-sh/nvm/v0.39.2/install.sh | bash
source ~/.bashrc
nvm install --lts
The above will install the latest stable version of Node and npm in our machine.
We will use PM2 process manager to run our Next app in the background, you can install it by running
npm i -g pm2
Configuring swap space in memory
Now, since we are on free-tier and we only have 1GB of RAM for our instance, we might run into memory error while building our Next app, so we need to configure swap space in order to prevent that scenario beforehand. Swap is a virtual memory, which basically uses a chunk of your hard disk space when it runs out of RAM, you can read more about it if you want.
To configure swap space, run
sudo fallocate -l 4G /swapfile
sudo chmod 600 /swapfile
sudo mkswap /swapfile
sudo swapon /swapfile
sudo cp /etc/fstab /etc/fstab.bak
echo '/swapfile none swap sw 0 0' | sudo tee -a /etc/fstab
Now if you run free -h in your shell you should be able to see something like

Configuring Nginx server
To configure our server, run
sudo nano /etc/nginx/conf.d/example.conf
This will open a nano editor, paste the following content in it
server {
    listen 80;
    listen [::]:80;

location / {
        proxy_pass http://127.0.0.1:3000;
        proxy_set_header Host $host;
        proxy_set_header X-Real-IP $remote_addr;
        proxy_set_header X-Forwarded-For $proxy_add_x_forwarded_for;
        proxy_set_header X-Forwarded-Proto $scheme;
    }
}
Then press control + x -> type y -> press enter
Now restart your Nginx service using the following command
sudo systemctl restart nginx
Great! Now we have our Nginx setup, if the above command did not throw an error, you're good to go, otherwise please go through the steps again, or check whether you missed any semicolons in example.conf file.
Setting up CI/CD with GitHub actions
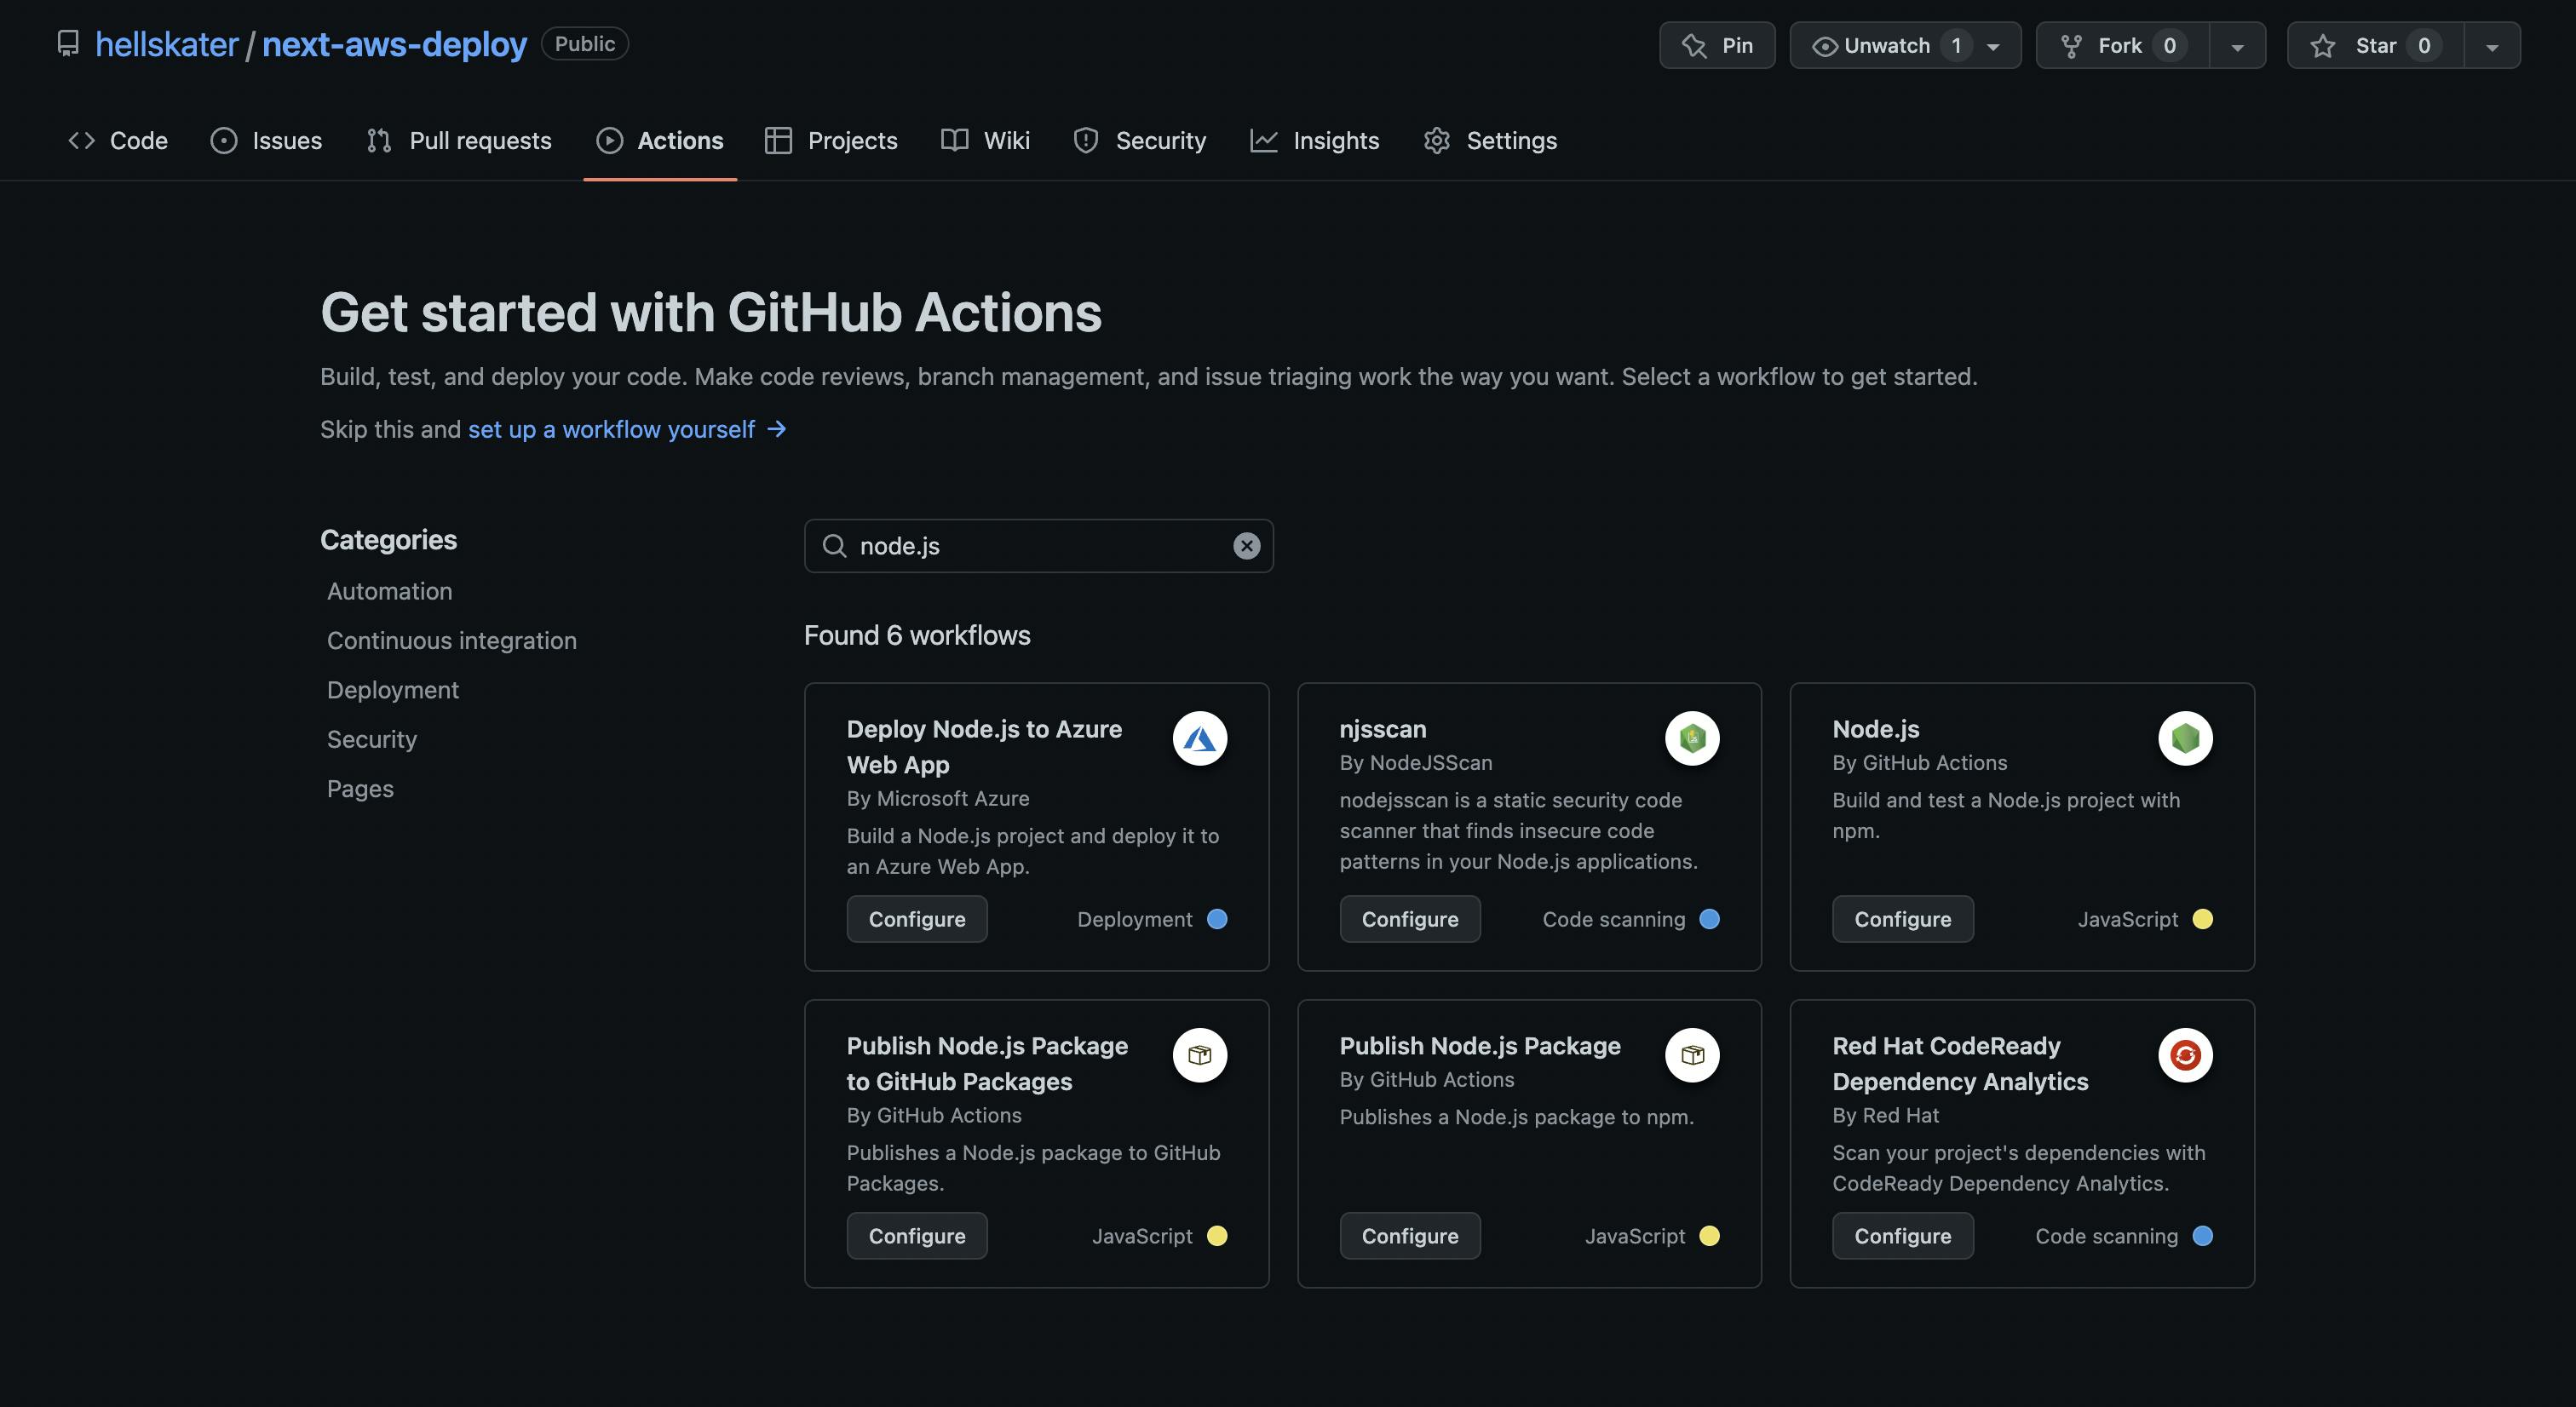
Now, head over to your GitHub repo, click on Actions on the navbar, search for Node.js and click on configure on the Node.js workflow
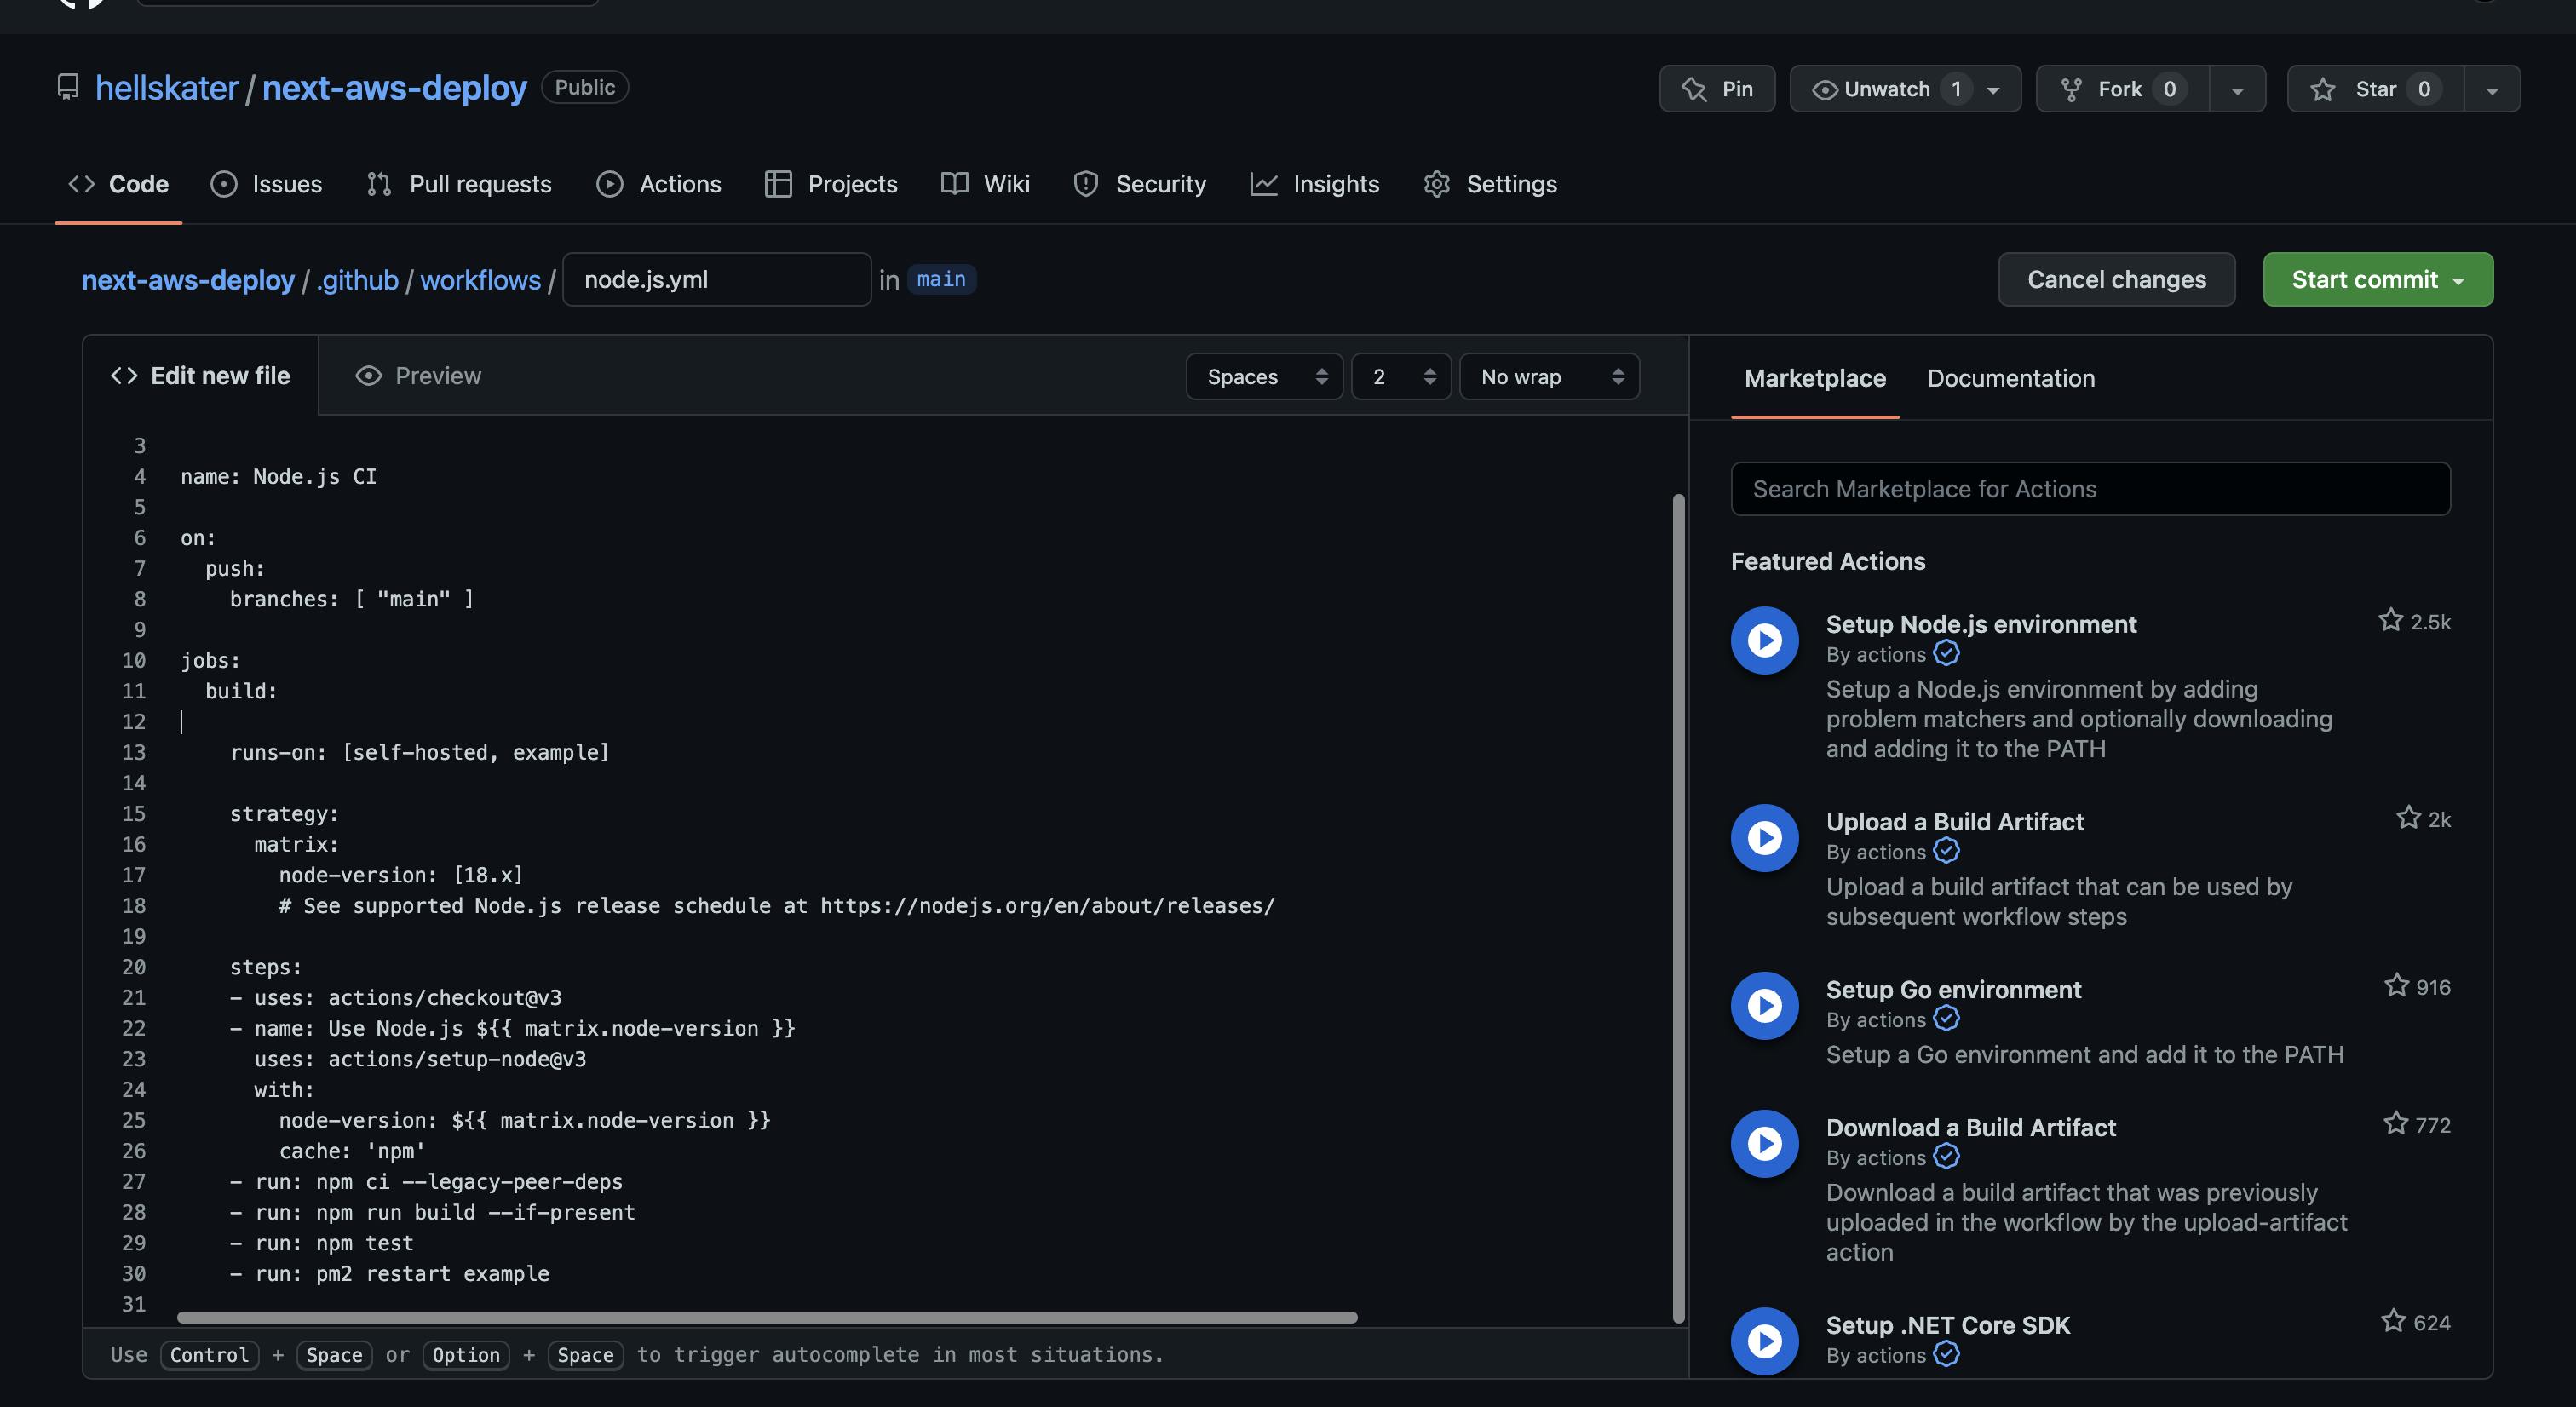
In the edit tab, paste the following content and click on Start commit -> Commit new file
name: Node.js CI

on:
  push:
    branches: [ "main" ]

jobs:
  build:

    runs-on: [self-hosted, example]

    strategy:
      matrix:
        node-version: [18.x]
        # See supported Node.js release schedule at https://nodejs.org/en/about/releases/

    steps:
    - uses: actions/checkout@v3
    - name: Use Node.js ${{ matrix.node-version }}
      uses: actions/setup-node@v3
      with:
        node-version: ${{ matrix.node-version }}
        cache: 'npm'
    - run: npm ci --legacy-peer-deps
    - run: npm run build --if-present
    - run: pm2 restart example
Now in the root directory of your project in GitHub, you should have a .github/workflows/node.js.yml file
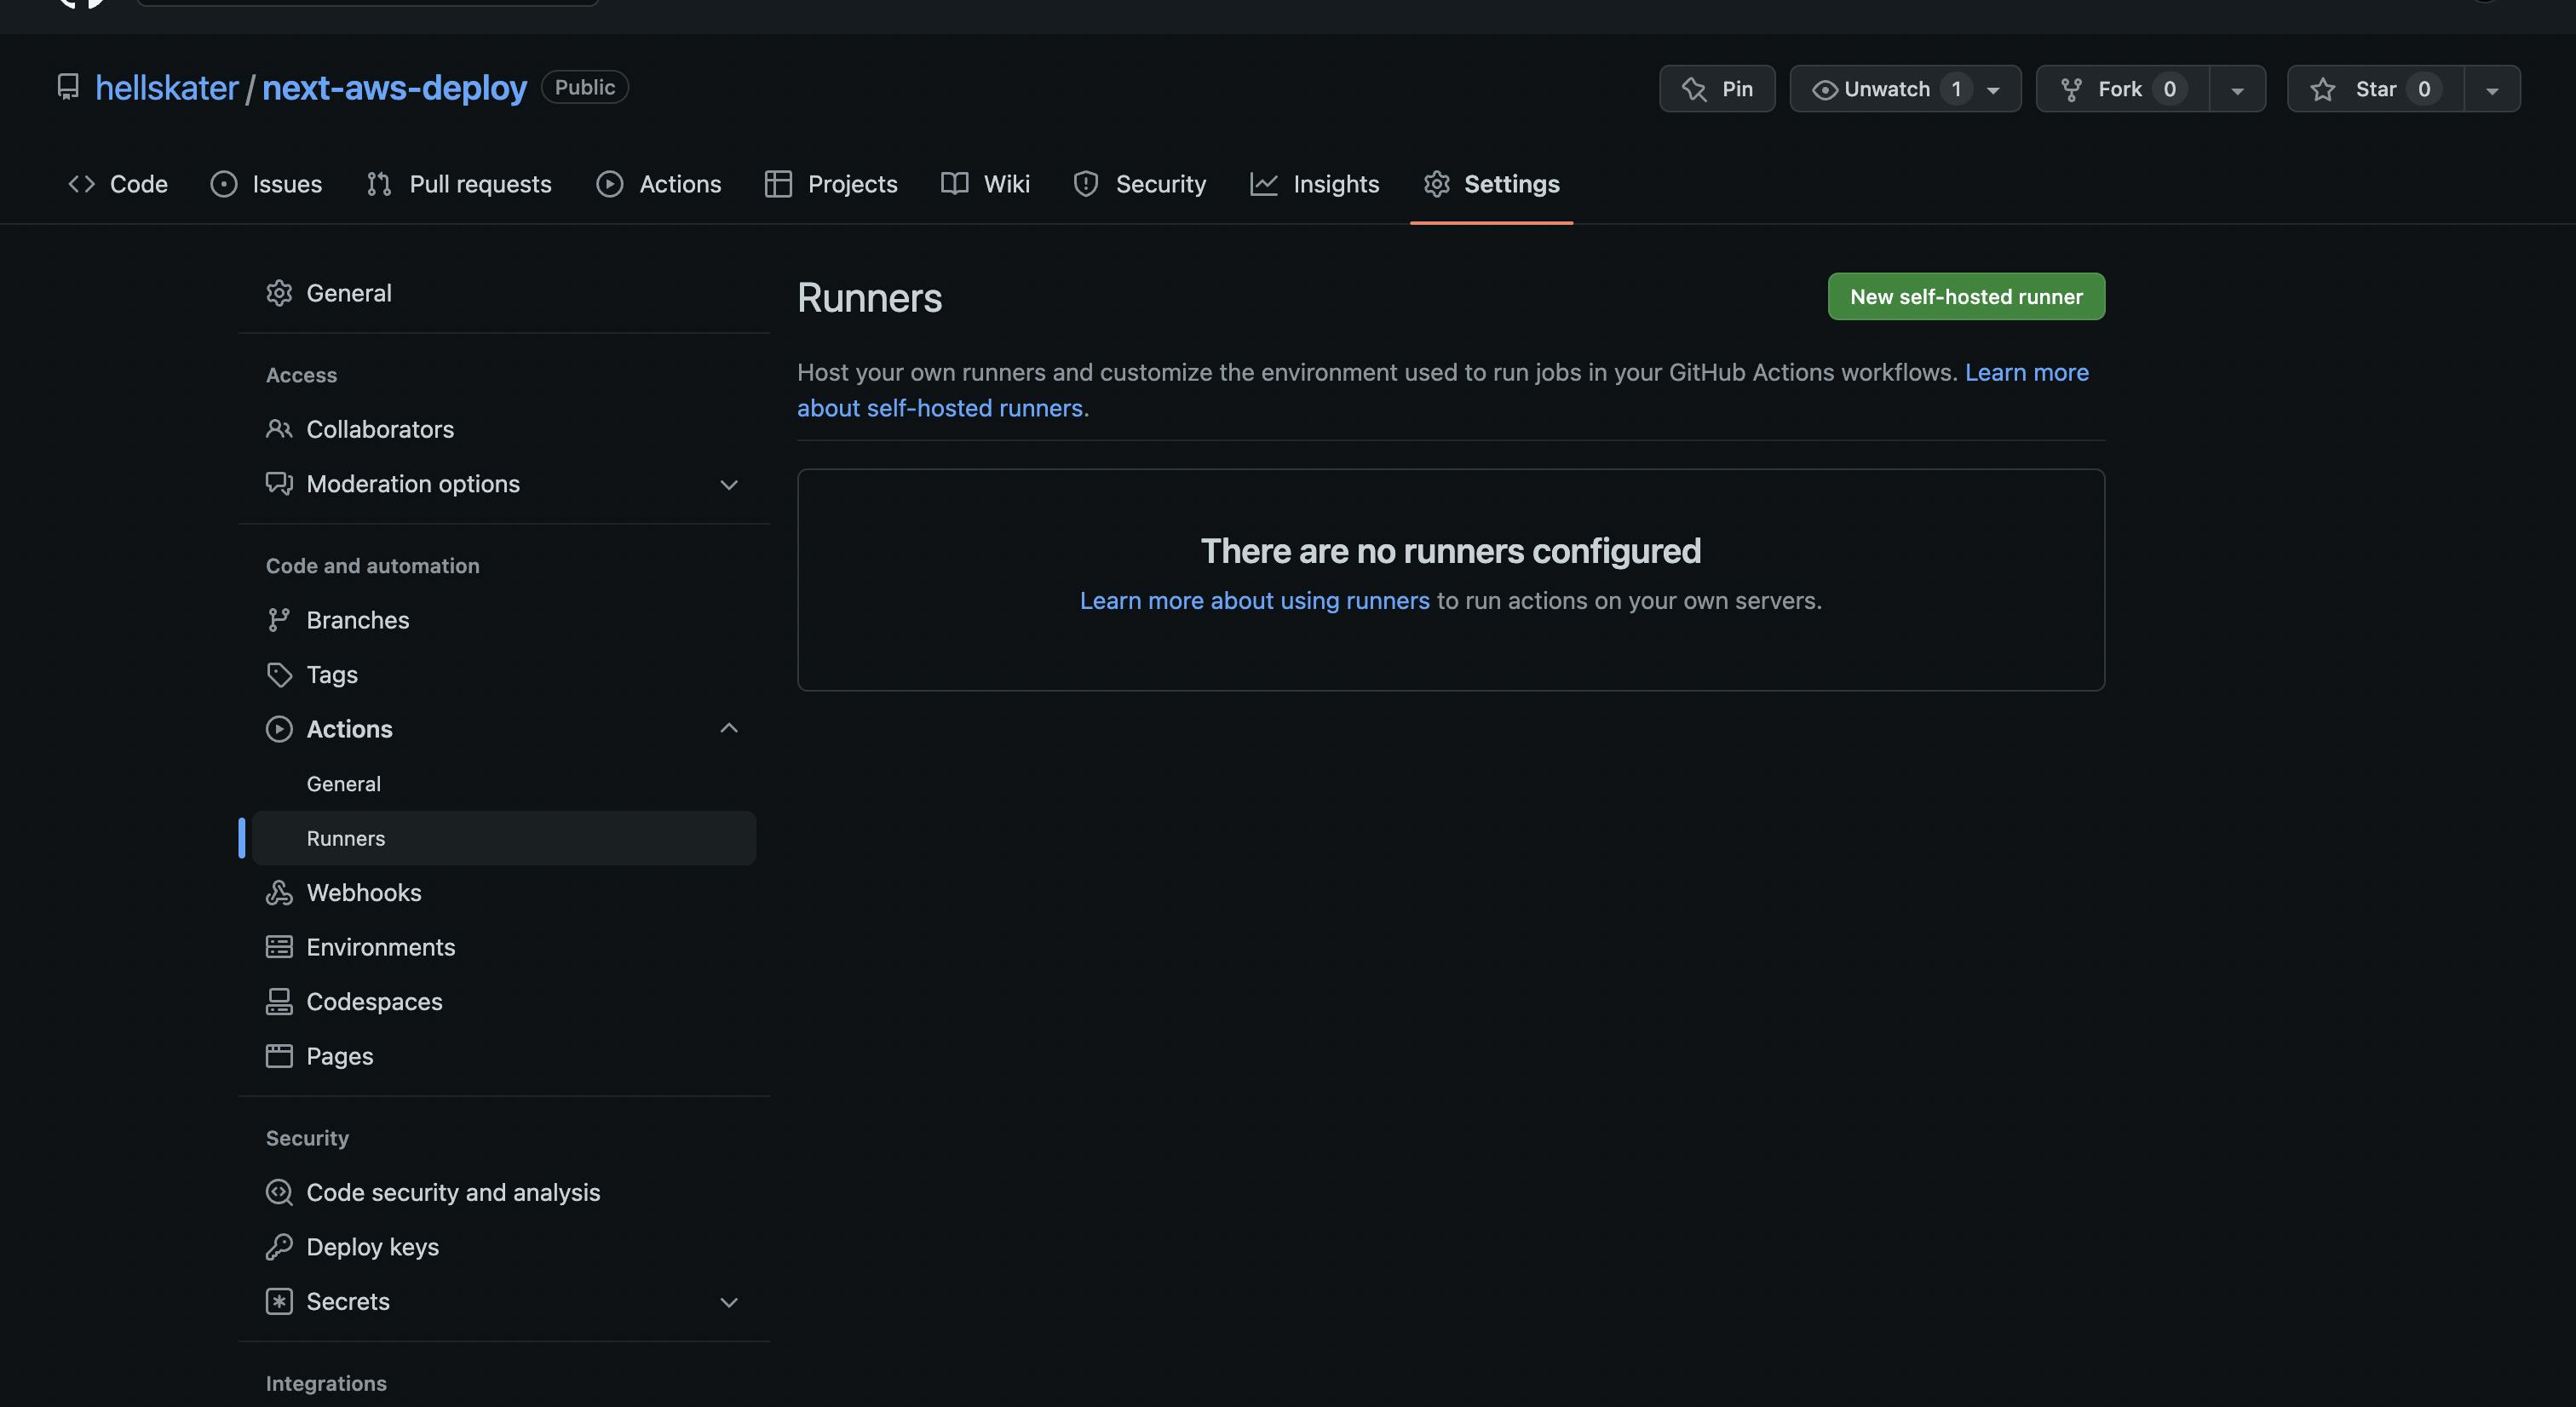
Great! Now let's configure a self-hosted runner which will push and deploy our code in the AWS server every time we push to our main branch
In your GitHub repo, go to Settings -> Actions -> Runners -> New self-hosted runner
Select Linux as runner image. And you should see the following screen
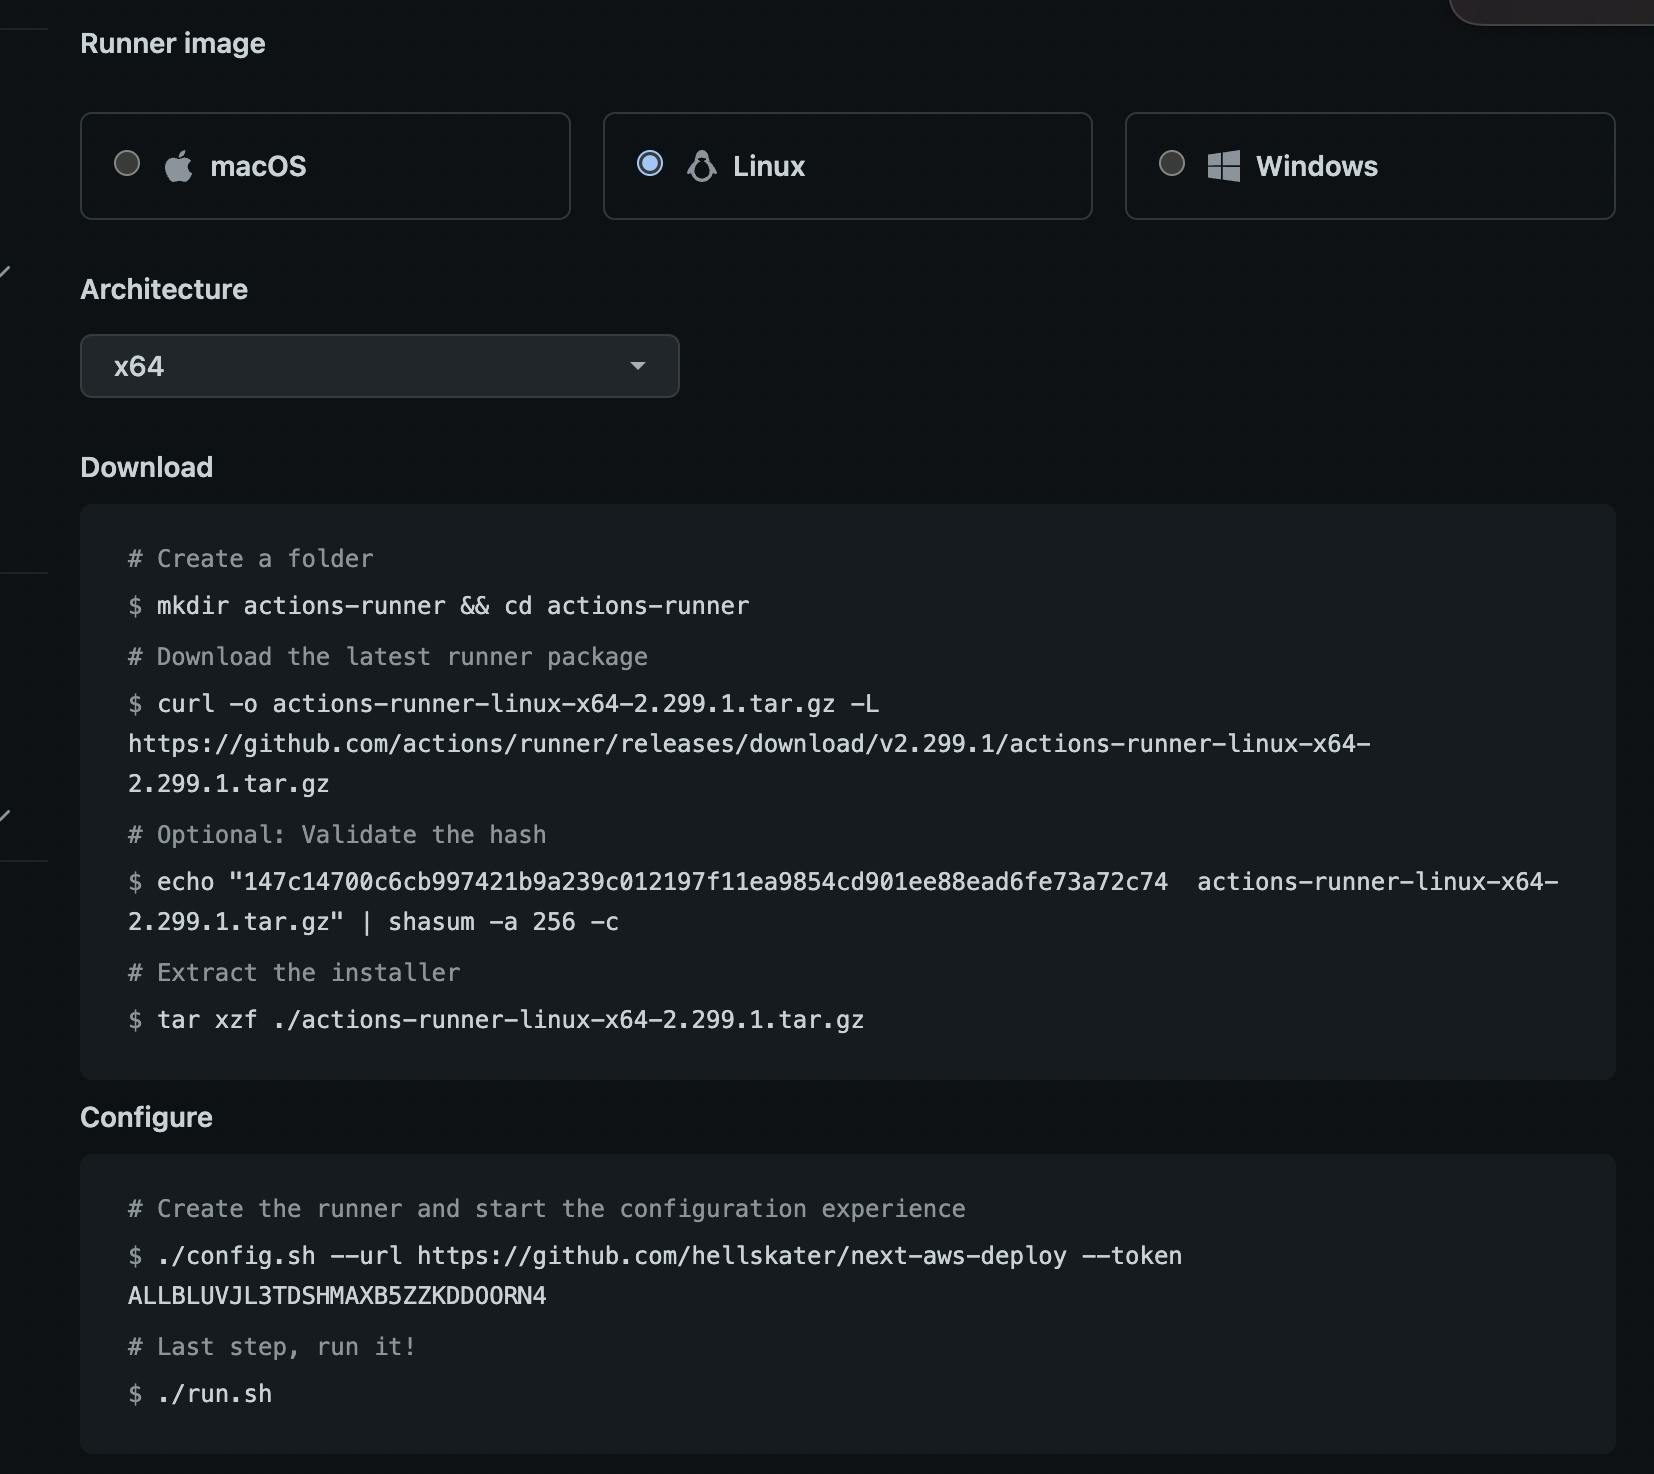
Copy, paste and run every command in the Download box, one by one in your SSH shell where you're connected to the EC2 instance. Your terminal should look something like

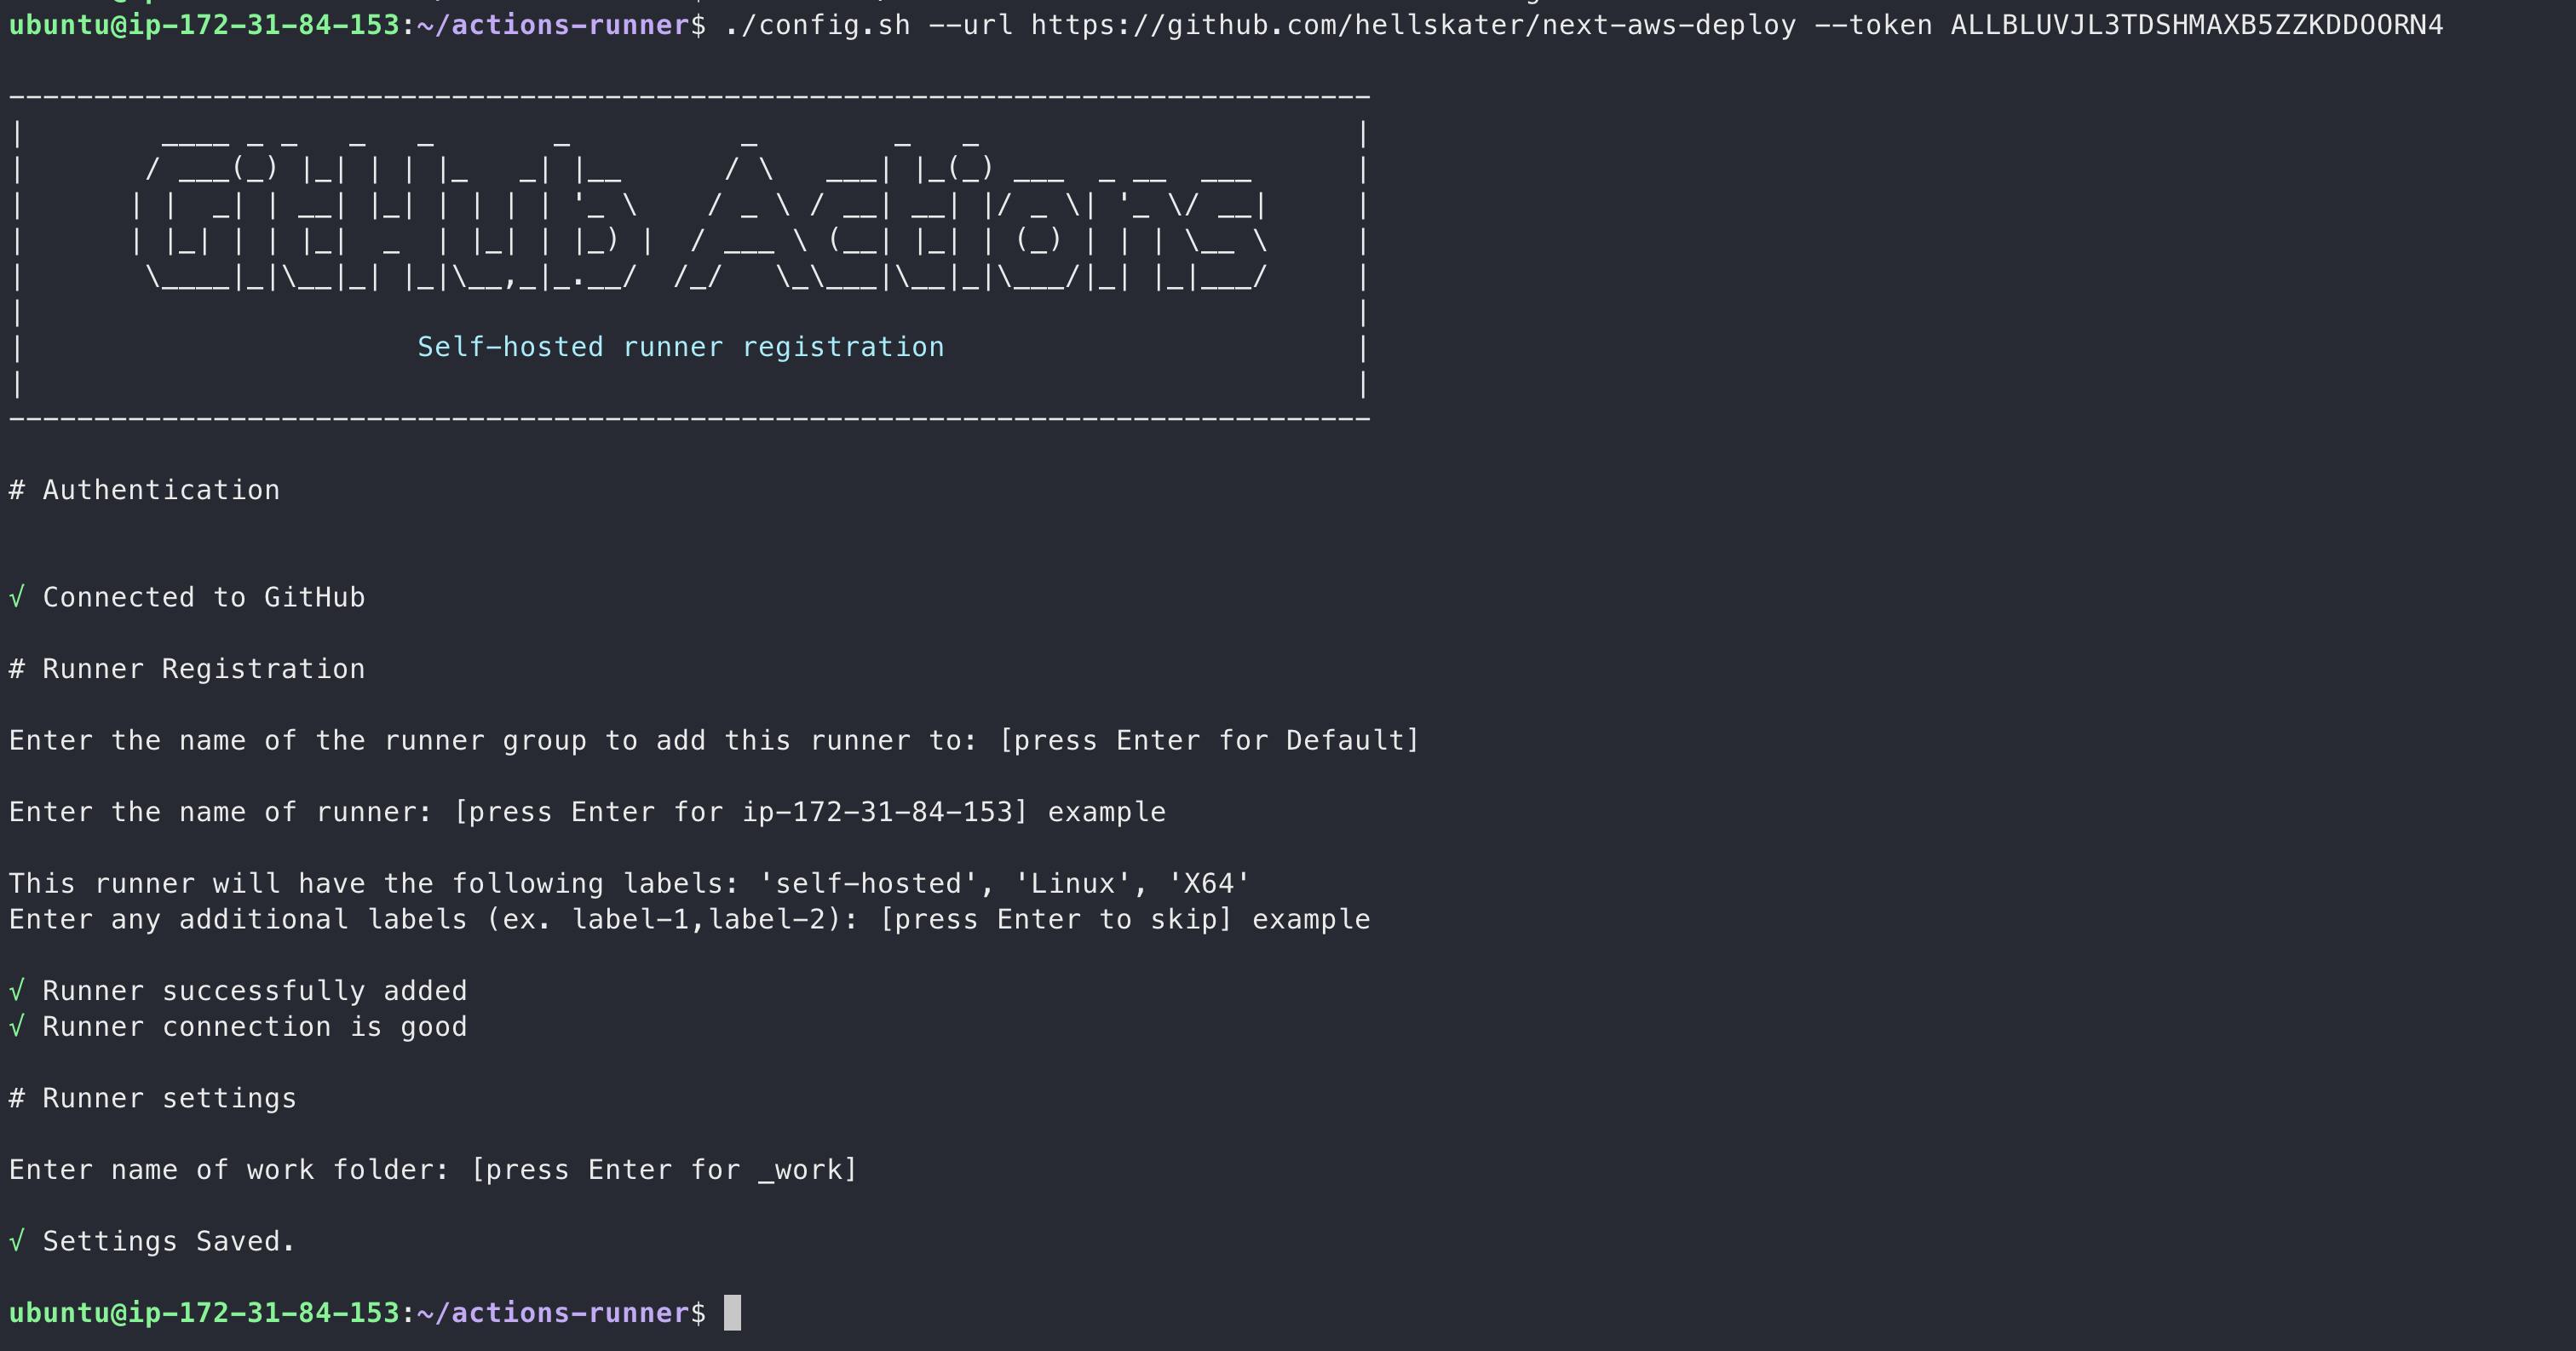
Now copy the 1st command from the Configure tab and paste it in terminal
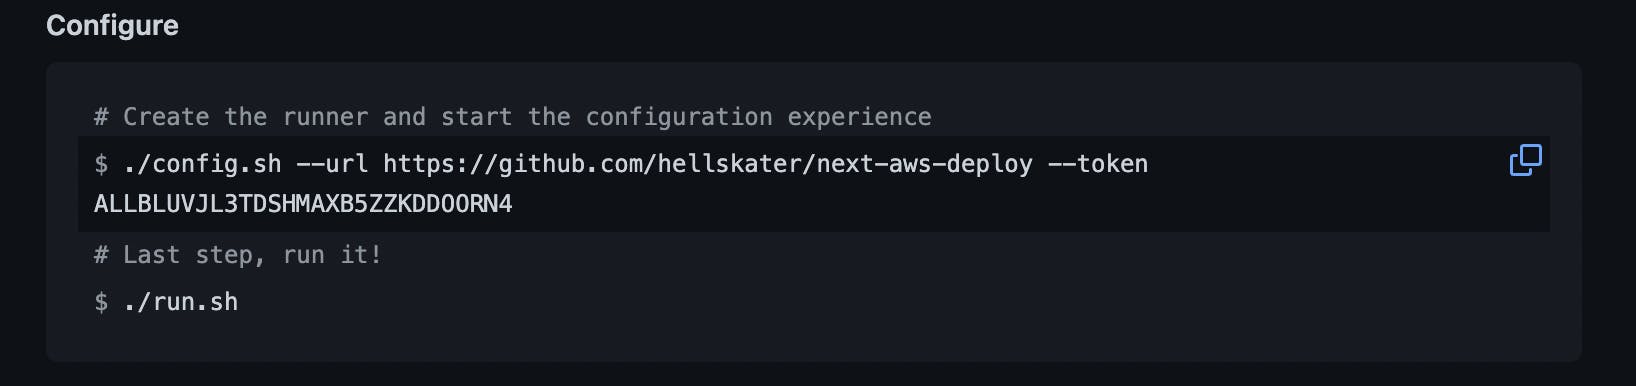
A shell prompt should appear after that
Enter the name of the runner group to add this runner to: [press Enter for Default]press enter for this oneEnter the name of runner: [press Enter for ip-172-31-84-153]type "example"This runner will have the following labels: 'self-hosted', 'Linux', 'X64' Enter any additional labels (ex. label-1,label-2): [press Enter to skip]type "example"Enter name of work folder: [press Enter for _work]press enter
Then, paste the following commands
sudo ./svc.sh install
sudo ./svc.sh start
At this point if you run ls, you should see a _work folder, in case you don't, just go to your local project, change something, add -> commit -> push, which will trigger a deployment and the _wok folder should appear
Now run
cd _work
cd <YOUR-GITHUB-PROJECT-NAME>
cd <YOUR-GITHUB-PROJECT-NAME>
pm2 start npm --name "example" -- start
Replace with your own project name, you can use ls to check the name, which in my case is
cd _work
cd next-aws-deploy
cd next-aws-deploy
pm2 start npm --name "example" -- start
Alright, now you should see something like this on your terminal

If you do, then GREAT!! Now, if you're ready to see some magic, copy the public dns address of you instance from your EC2 console, which should look something like ec2-44-201-126-205.compute-1.amazonaws.com.
Open a new tab in your browser, and type this url
http://<YOUR-PUBLIC-DNS-ADDRESS>:3000/
So, in my case, the URL looks something like
http://ec2-44-201-126-205.compute-1.amazonaws.com:3000/
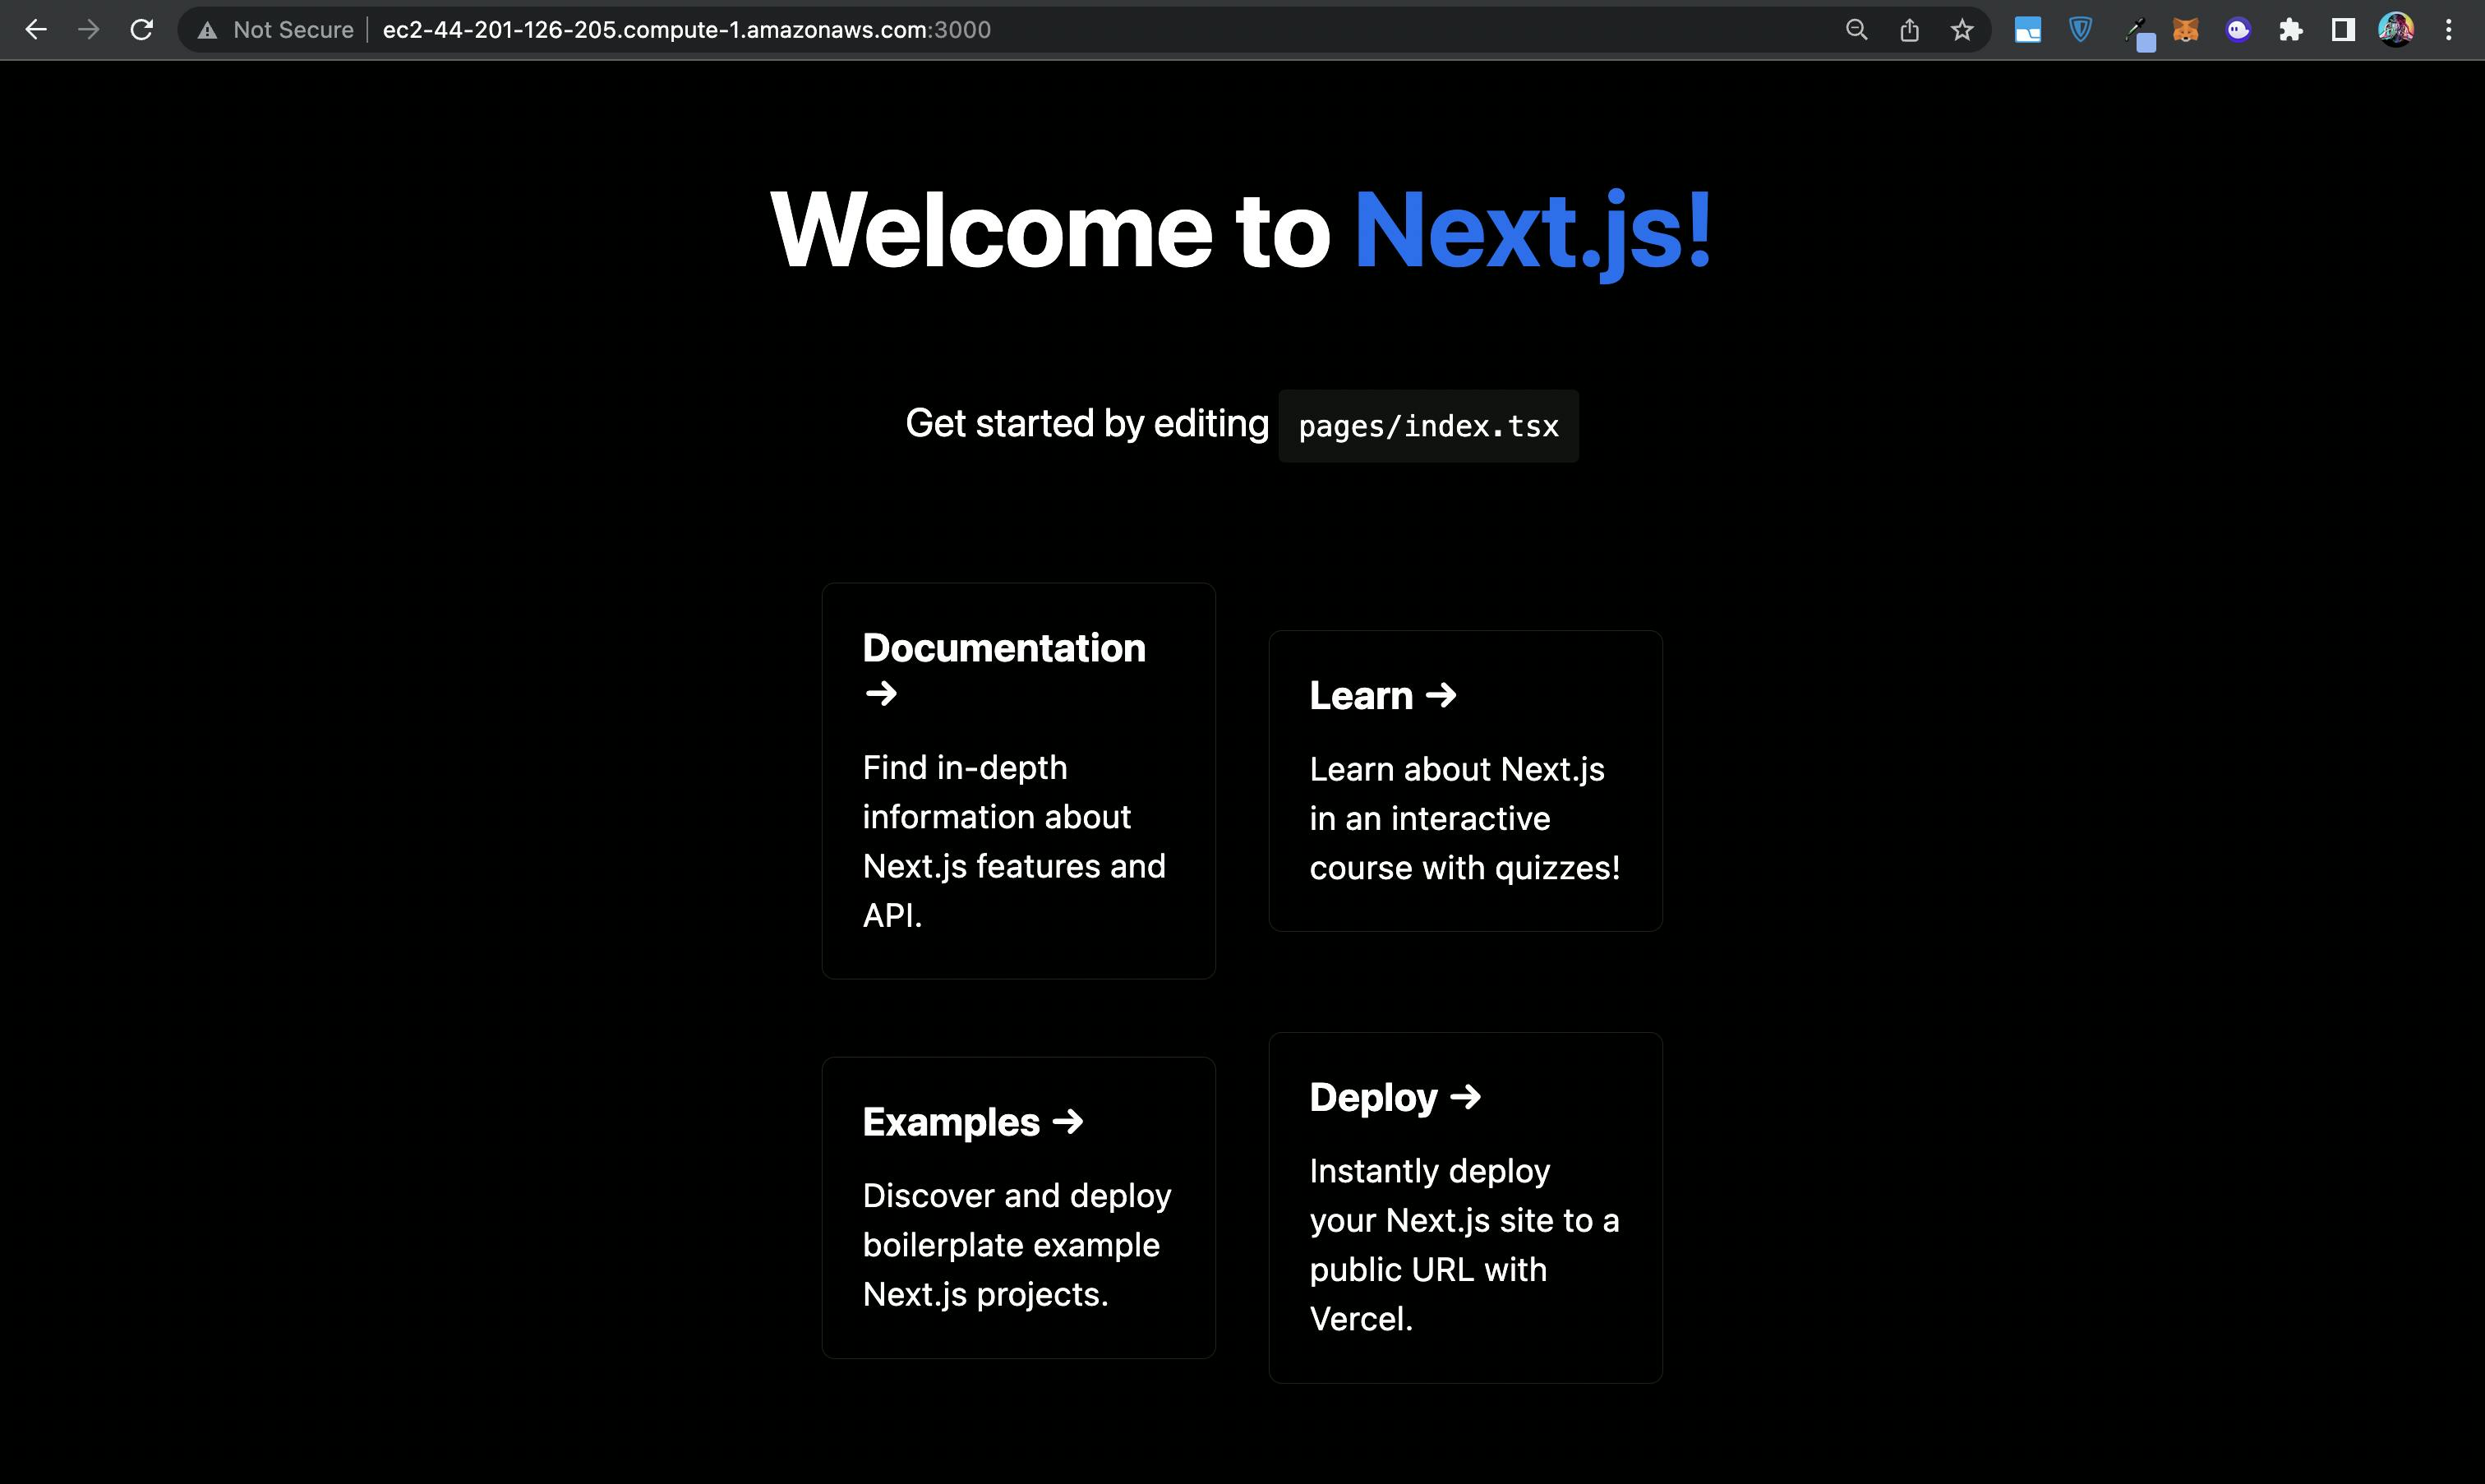
If you see your app then CONGRATULATIONS!!! 🚀 We have made it.
Our Next app is successfully deployed on AWS EC2, and we have a CI/CD setup in GitHub, so every time you push to your main branch, your code will be deployed to the server.
If you have a custom domain of your own, which you want to configure with the server with SSL certificate, then stay tuned. We will go through it in the next post.